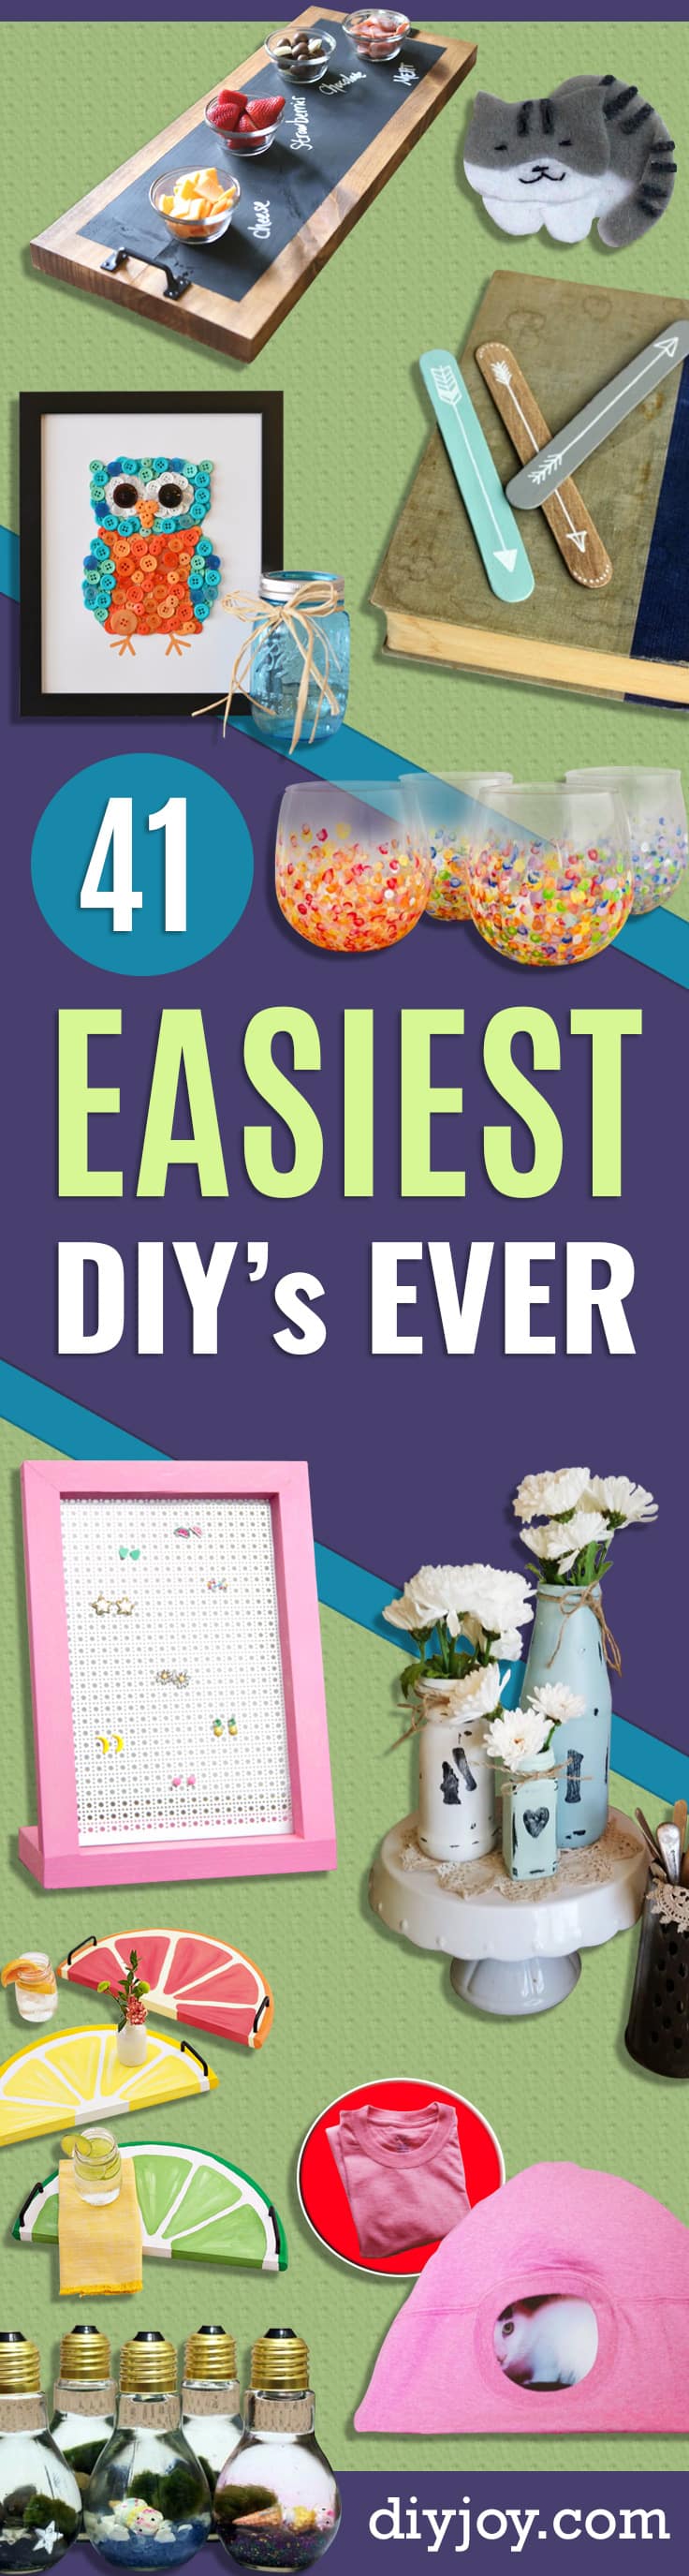
Nobody needs another craft that eats a whole weekend and then does not work. These easy DIY projects are the opposite of that: an hour here, a bag of supplies you mostly own already, and something at the end you will actually keep. There are paper flowers that never need water, a heating pad you fill with rice and lavender, pineapple bookends, a jewelry frame that holds every stud you own, planters made from soda bottles and a globe that goes black and gold. Some are five minutes. None of them are hard. Twelve of them are ours, filmed start to finish so you can watch the part that always goes wrong for everybody. Every outside tutorial links back to the maker who worked it out.
Table of Contents
- 1. Easy DIY Project – Homemade Whiteboards
- 2. Easy DIY Jewelry Display Earrings
- 3. DIY Quick Easy Homey Vases
- 4. DIY Photo Wall Hanging
- 5. Easy Padded Coin Purse Tutorial
- Easy Crafts and DIYs
- 6. Crepe Paper Flowers
- 7. Easy Pineapple DIY Bookends
- 8. Quick And Easy DIY Map Magnets
- 9. Recycled Bag From Jeans
- 10. DIY Cardboard Pom Pom Maker
- 11. Handmade Jewelry Dishes With Copper Touches
- 12. DIY Jute Rope Tray
- 13. Soup Can Flower Vases
- 14. Pom Pom Mouse Pad
- 15. DIY Geometric Paper Wall Art
- 16. Grocery Bag Holder From A Tote Bag
- 17. Easy Leaf Printing
- 18. Easy DIY Heating Pad
- 19. DIY Owl Button Craft
- 20. DIY Stained Glass Ornaments
- 21. Junk Mail Typography Collage Art
- 22. DIY Pocket Tic Tac Toe Game
- 23. Salt Water Etched Bottle
- 24. DIY Black And Gold Globe
- 25. Paper Hyacinth Flowers
- 26. Easy Marimo Moss Ball DIY Light Bulb Aquarium
- 27. Sharpie Dot Flower Pot Craft
- 28. DIY Floral Mouse Pad
- 29. DIY Faux Stone Planters
- 30. DIY Soda Bottle Kitty Cat Planters
- 31. DIY Sharpie Mug
- 32. DIY Easy Braided Bracelet
- 33. DIY Hoop Tassel Earrings
- 34. Yarn Pumpkins Made From Toilet Paper Rolls
- 35. How To Make A Spider Web Using Hot Glue
- 36. 5-Minute Mini Notebook DIY
- 37. DIY Hot Glue Keychain
- 38. Upcycled DIY Light Bulb Mini Planter
- 39. DIY Air-Dry Clay Jewelry Organizer Using Pebbles
- 40. DIY Paper Candy Package
- 41. DIY Denim Jean Organizer
1. Easy DIY Project – Homemade Whiteboards
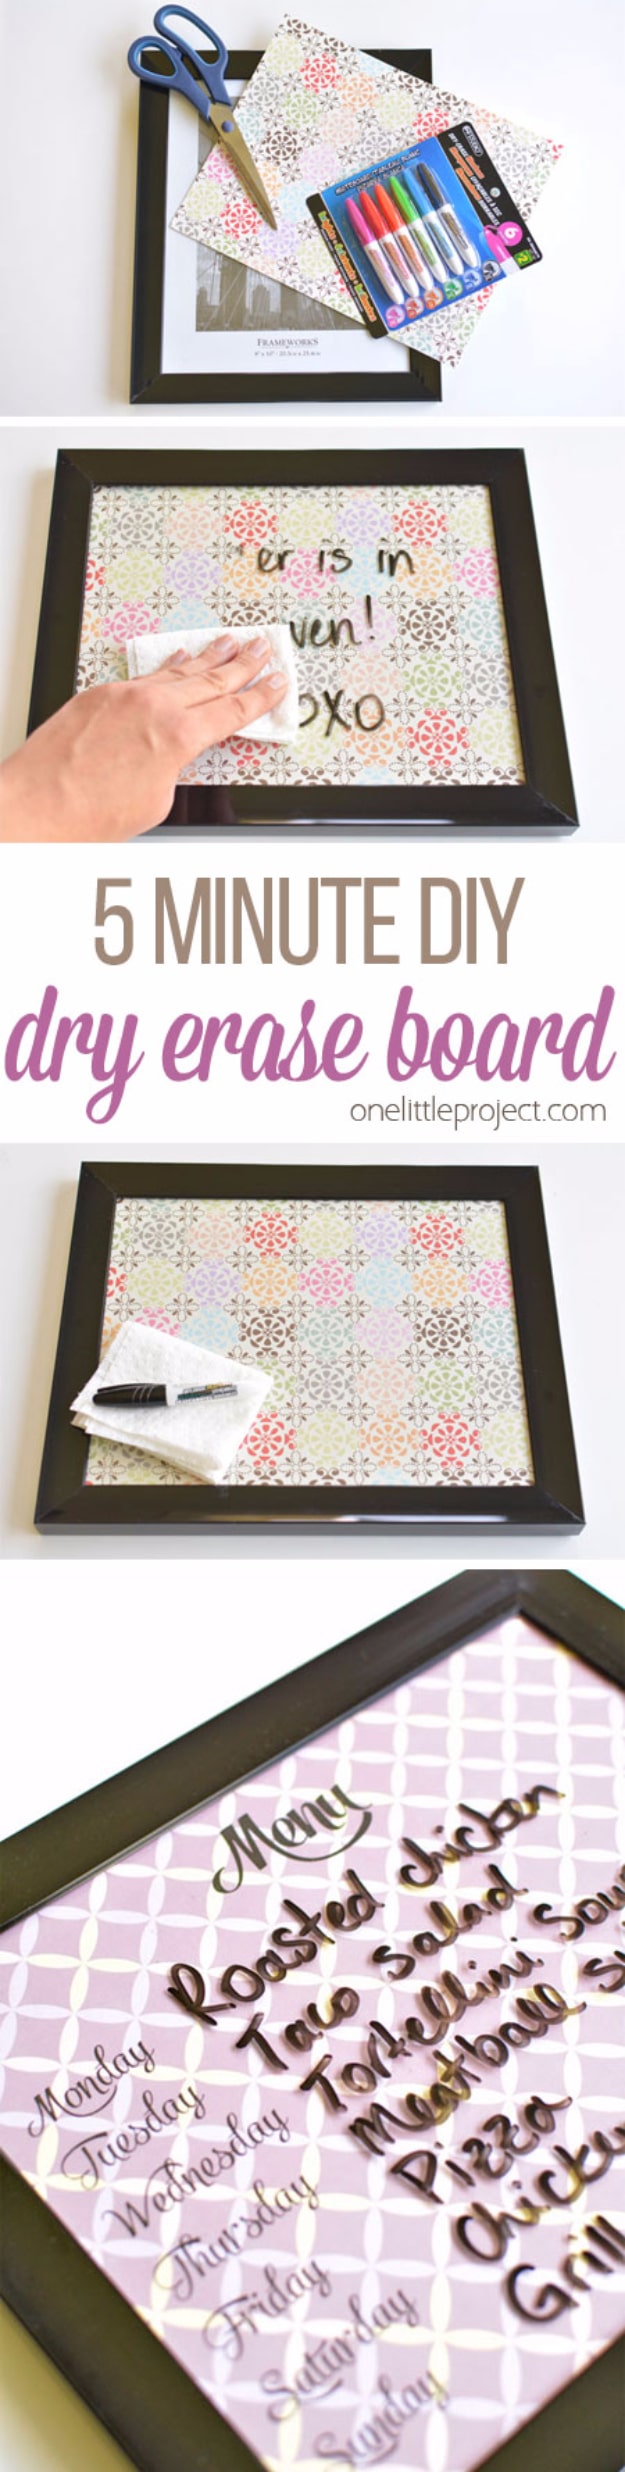
A cheap picture frame, a sheet of patterned paper behind the glass, and a dry erase marker. That is the entire build, and the reason it works is that glass wipes clean better than any whiteboard you can buy, so the pattern underneath shows through and the week’s dinners sit on top of it. Swap the paper to change the whole look for the cost of one scrapbook sheet. Hang it in the kitchen where people ask what is for dinner, and it stops answering that question for you.
Get the full tutorial at One Little Project.
2. Easy DIY Jewelry Display Earrings
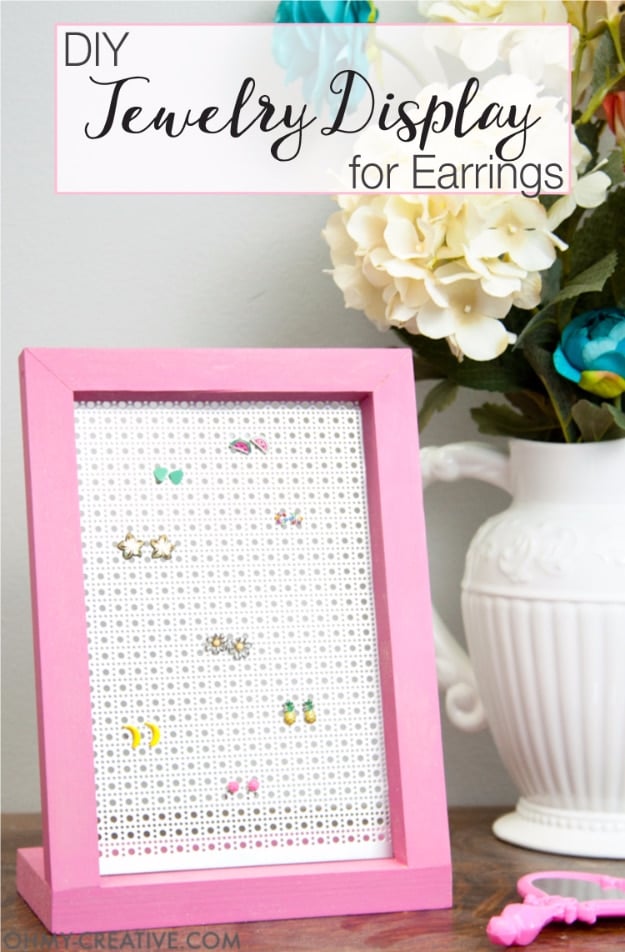
A shallow painted frame with a sheet of decorative perforated aluminum stretched across it, so every stud pushes through a hole and stays where you put it. The whole frame comes out of 30 inches of 1×1 board and 7 inches of 1×4, with 45 degree cuts at the corners, and the maker is clear that a miter box and hand saw will do it if you have no power tools. A nail gun holds the corners, or corner brackets and a drill will too. Hardwood is worth it at this size.
Get the full tutorial at Oh My Creative.
3. DIY Quick Easy Homey Vases
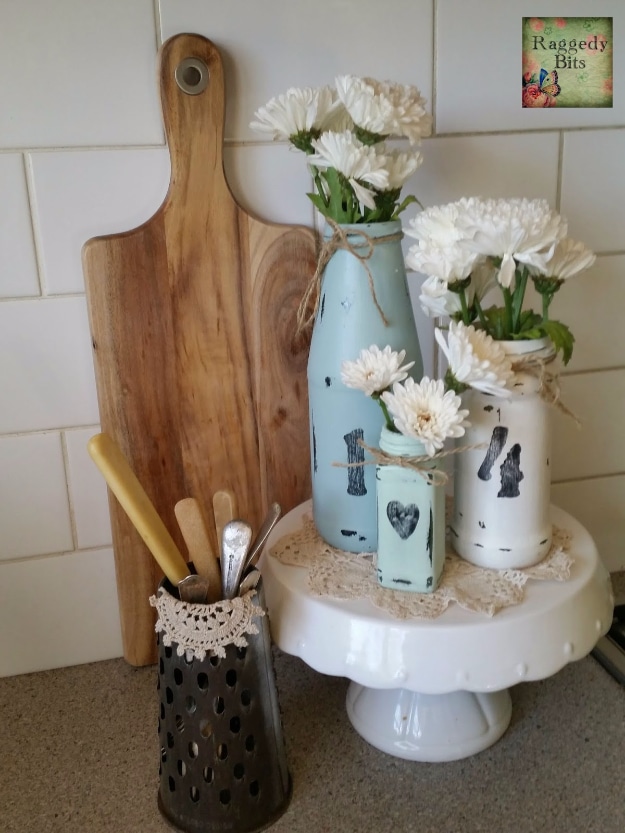
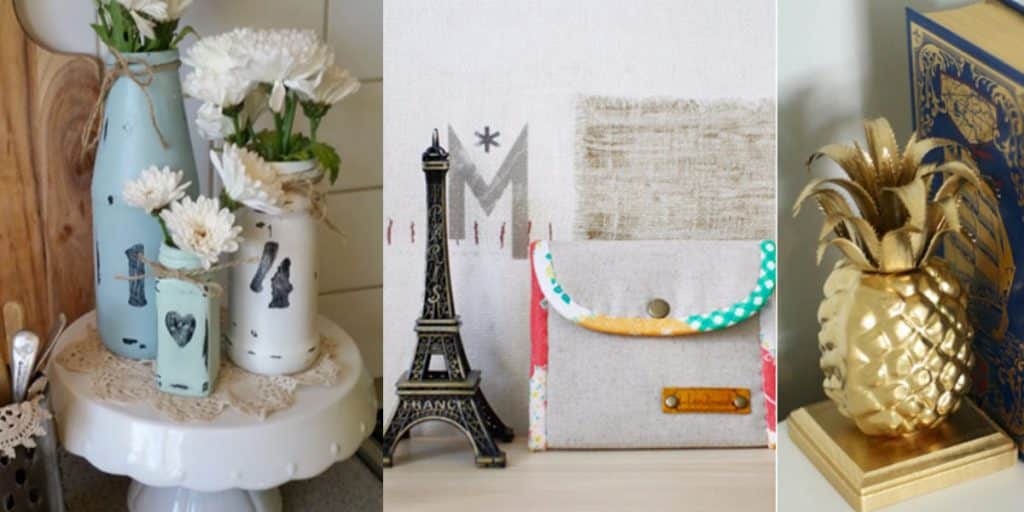
Saved jars painted in soft chalky blues and white, with a number stencilled on each one in black and sanded back so the color wears through, finished with a jute bow at the neck. The numbers are what lift these above a row of painted jars, and the sanding is what makes them look found rather than made. The maker primes the glass first so the paint actually grips, then seals the whole jar with wax at the end. Wash the jars in the dishwasher before any of it, because paint will not hold on a greasy jar.
Get the full tutorial at Raggedy Bits.
4. DIY Photo Wall Hanging

A black painted dowel with three lines of yarn dropping from it, small square photos clipped down each line and a black clay triangle weighting the bottom of each one. Every double knot gets a dab of super glue, which is the detail that keeps the whole thing from sagging over a month on the wall. The triangles are cut from rolled black polymer clay using a cardstock template, holed with a straw twisted out so the plug comes with it, then baked at 260F for about thirty minutes.
Get the full tutorial at Homey Oh My.
5. Easy Padded Coin Purse Tutorial
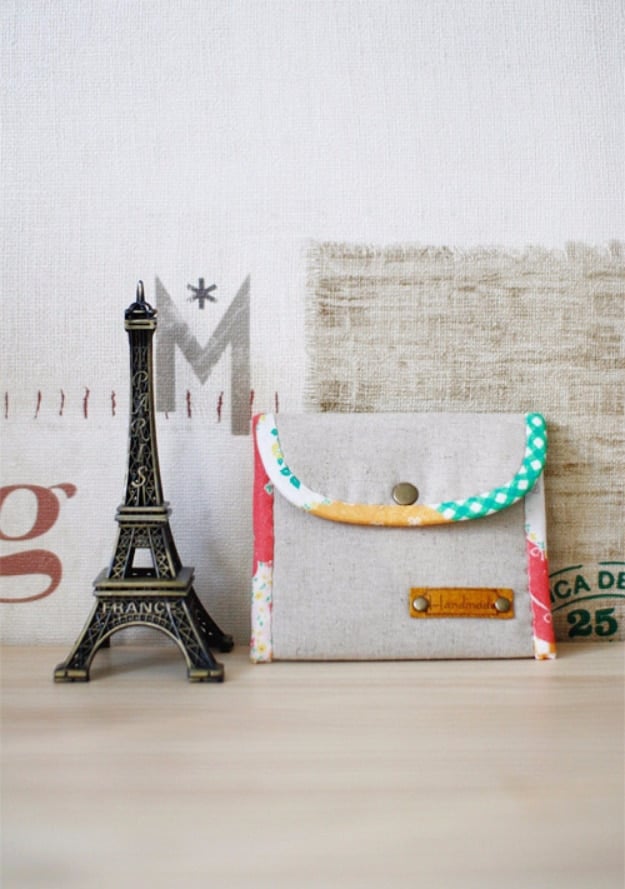
A small padded purse with a curved flap, a snap closure and a contrasting band of aqua polka dot along the top edge. The padding is the whole difference between this and a flat fabric pouch: interfacing or fleece inside gives the body that holds its shape when it is empty, which is what makes a small bag look finished. Worth knowing before you click is that the tutorial is a picture sequence rather than written steps, so it reads best if you are already comfortable with a straight seam.
Get the full tutorial at Handmadiya.
Easy Crafts and DIYs
6. Crepe Paper Flowers
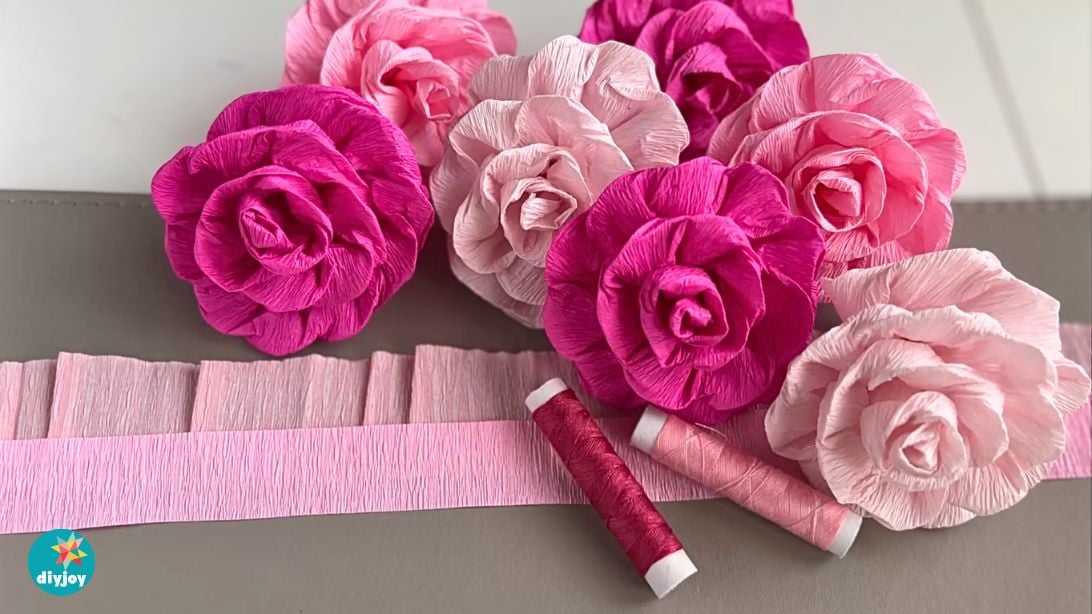
Crepe paper cut into long fringed strips, then rolled tight and eased open into full roses in three shades of pink. The fringing is the whole technique: every snip along the edge becomes a petal tip once the strip is coiled, so the flower gets its ruffle from cutting rather than from shaping. Roll loosely if you want a blown open rose and tightly for a bud, and make a dozen in mixed pinks for a backdrop that photographs beautifully behind a table. Ours, filmed start to finish.
Get the full tutorial at DIY Joy.
7. Easy Pineapple DIY Bookends
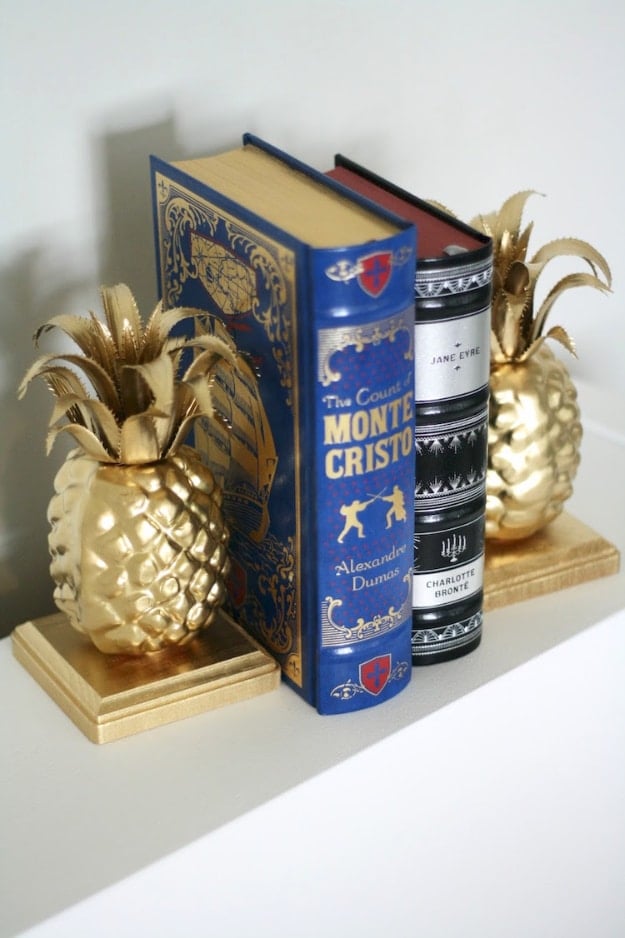
Two faux pineapples hot glued to small square wood bases and the whole lot sprayed gold, so the fruit and the block read as one cast object. The maker is honest that decorative bookends do not hold books, and gives the fix: cut a plug out of the center of each pineapple base, fill the hollow with sand or a little mixed cement, then glue the plug back in and seal it. That one step is the difference between an ornament and something that actually stops a row of hardbacks.
Get the full tutorial at DIY Candy.
8. Quick And Easy DIY Map Magnets
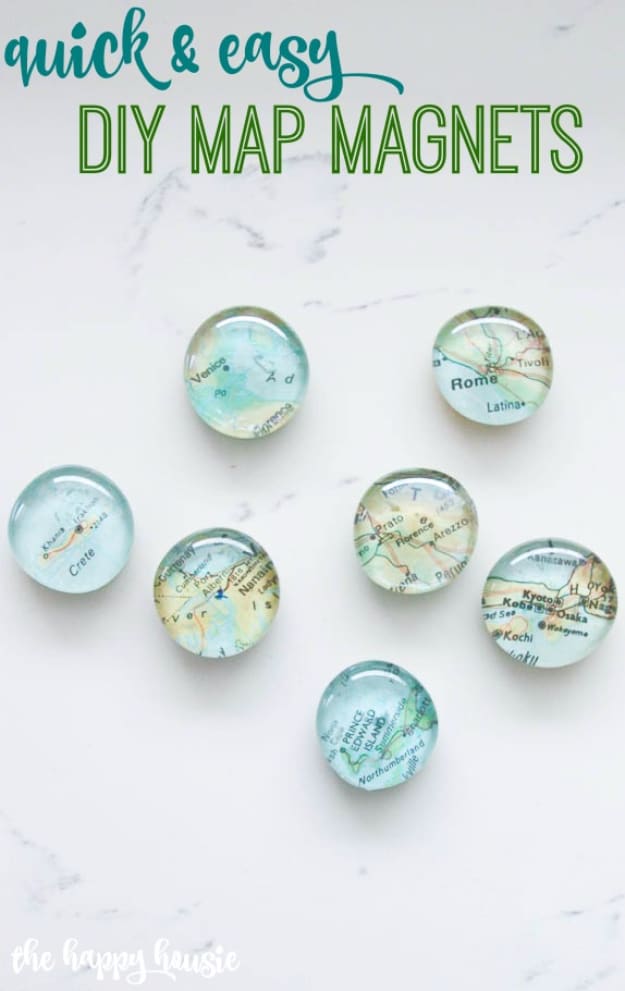
Flat backed glass floral rocks from the dollar store with a scrap of map Mod Podged onto the flat side, so the glass magnifies the place names underneath. Trace the rock onto the map first, cut inside the line, glue it face down and seal the back with a second coat. Then hot glue a magnet on, and pick a strong one, because the glass is heavier than it looks and a weak magnet will slide down the fridge with your grocery list. Choose places people have actually been and these become gifts.
Get the full tutorial at The Happy Housie.
9. Recycled Bag From Jeans
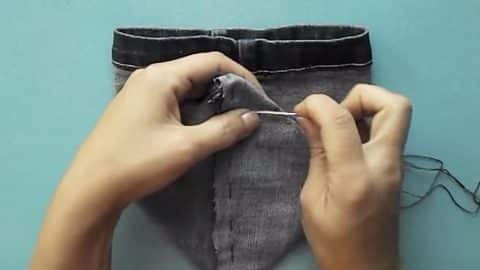
An old pair of jeans cut down and stitched into a bag, using the waistband and the existing seams as the structure so most of the hard construction is already done for you. Denim is the forgiving fabric for a first bag: it holds a crease, it does not fray into nothing, and a wobbly seam disappears into the weave. Pick a pair that is worn out at the knee and perfectly fine at the top, which is how almost every pair dies. Ours, with the whole thing filmed.
Get the full tutorial at DIY Joy.
10. DIY Cardboard Pom Pom Maker
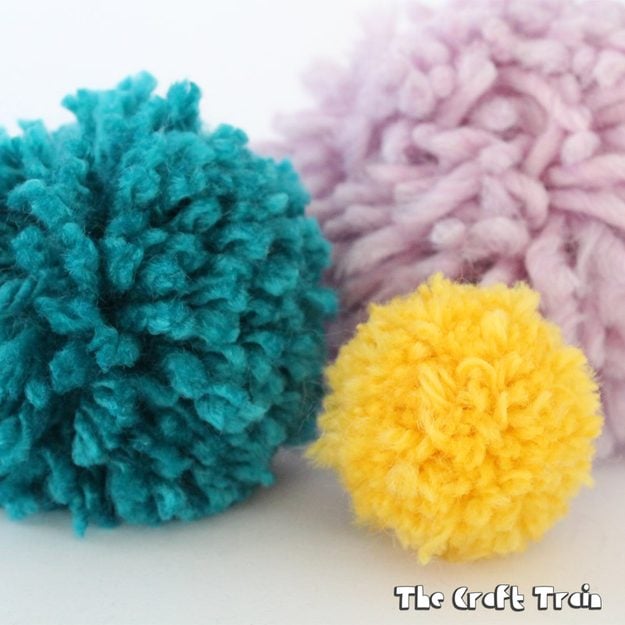
The tool is a rectangle of scrap cardboard with a slit cut most of the way down the middle, and that is genuinely all it is. Wrap yarn around it, tie tight through the slit, slide the bundle off, flip it and tie tighter on the other side, then cut the looped ends. The maker is refreshingly honest that plastic pom pom makers defeated her, and that the real secret is the trim at the end, not the wrapping. Chunky yarn gives the big fluffy ones, fine yarn the small neat ones.
Get the full tutorial at The Craft Train.
11. Handmade Jewelry Dishes With Copper Touches
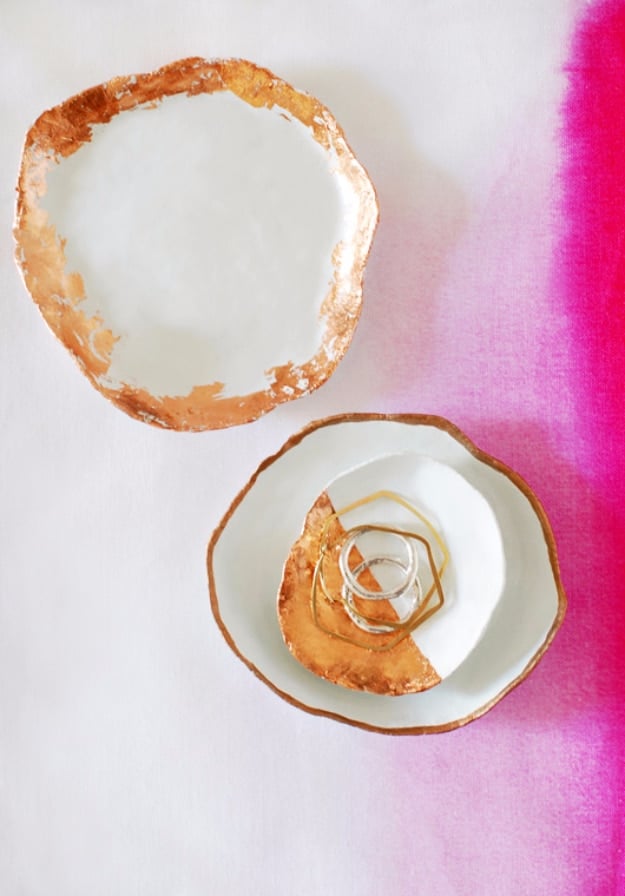
Free form white clay dishes with torn looking copper edges, sitting in a stack with rings dropped into the top one. They start as a rolled sausage of air dry clay about three eighths of an inch thick, coiled into a bowl, then smoothed and pinched steadily thinner until the walls flare out to under an eighth of an inch and some sides sit higher than others. The copper goes on afterwards, as a metallic sharpie on the rim or as leaf over sizing, finished with sealer. Work somewhere without a draft.
Get the full tutorial at decor8.
12. DIY Jute Rope Tray
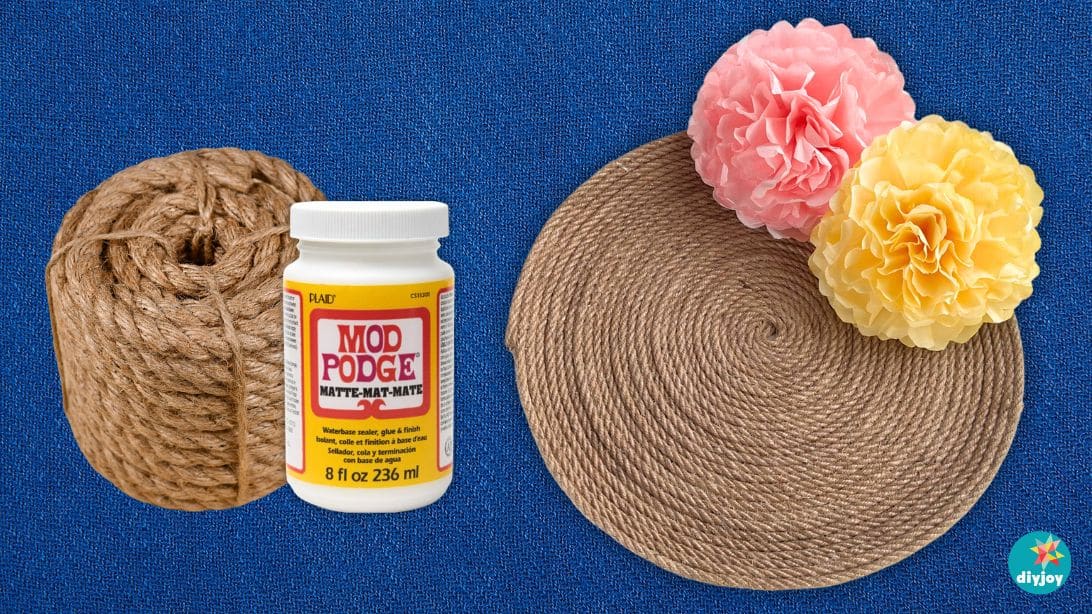
Jute rope coiled flat and stiffened with Mod Podge into a round tray, finished with two small paper pom poms on the rim. The size is entirely yours, which is the argument for making one rather than buying one, because the round tray you actually need for your coffee table is never the size the shop sells. Coil tightly and keep the glue moving as you go so each round grabs the one before it. Ours, and the rustic look comes out far better than the price suggests.
Get the full tutorial at DIY Joy.
13. Soup Can Flower Vases
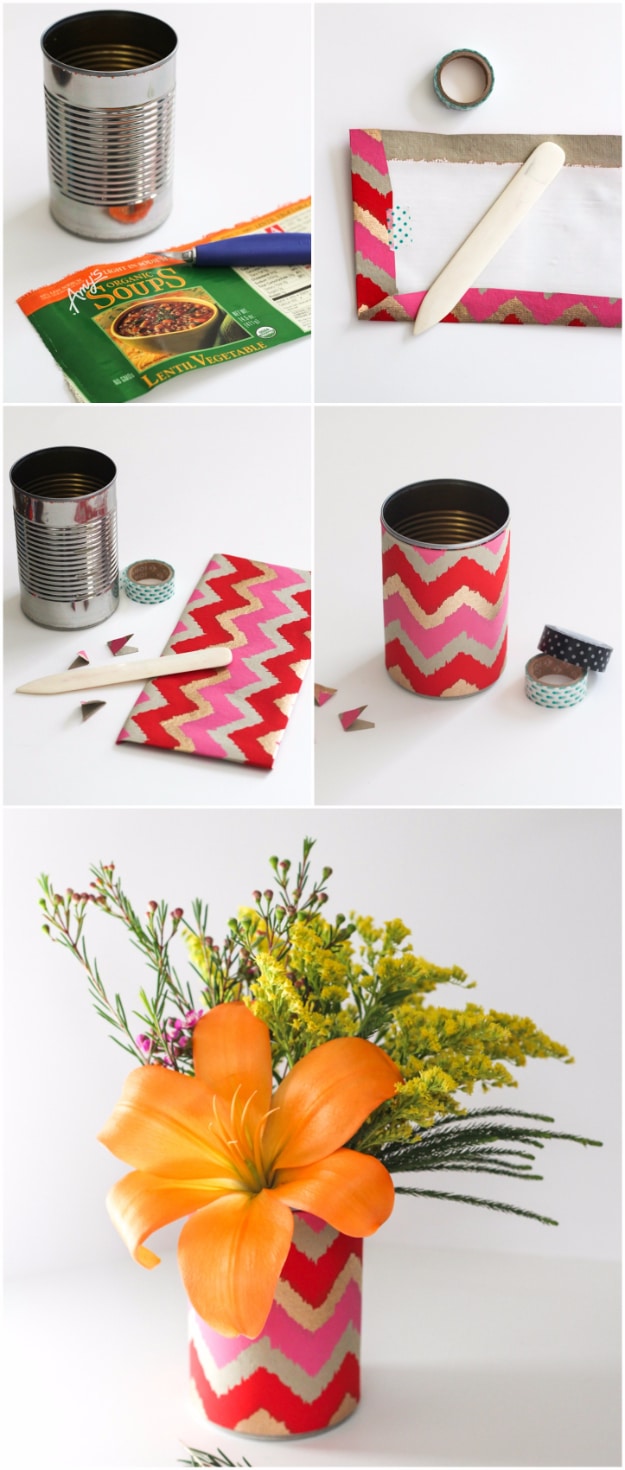
Empty cans wrapped in bright chevron paper and filled with flowers, and the clever part is the template. Peel the label off in one piece, use an x-acto knife to help it along, and then glue that label to the back of your paper as a cutting guide, because it is already exactly the right size. No measuring, no crooked cut, no gap at the back. Fold the ends over, tape them down, wrap it round the can and seal. A bone folder gives you the crisp edge.
Get the full tutorial at The Crafted Life.
14. Pom Pom Mouse Pad
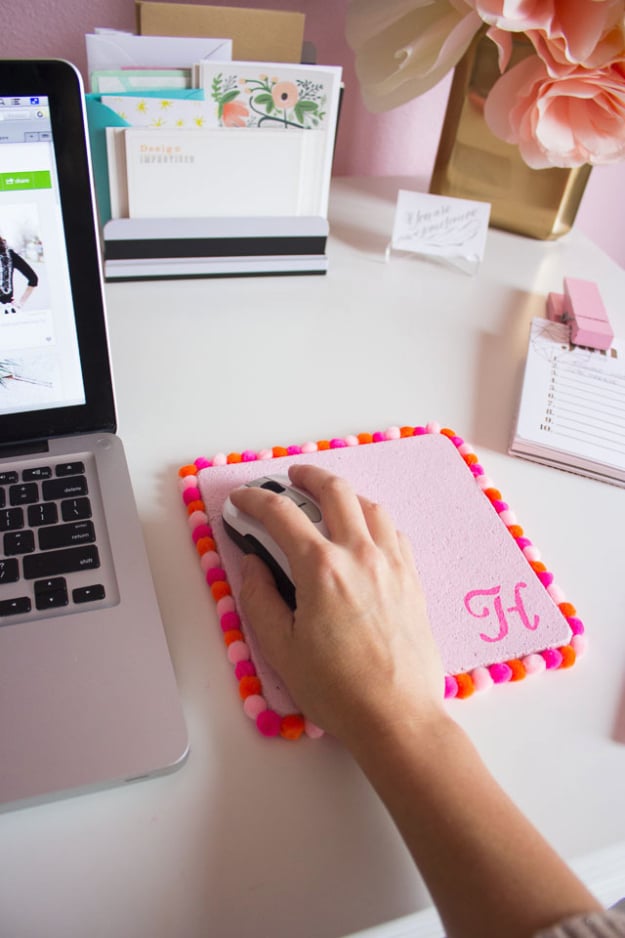
A cork trivet painted pink, monogrammed with a letter stencil and trimmed all the way round with small pom poms. The trivet is the whole trick, since a cheap one is already the right thickness and shape for a mouse pad and costs a couple of dollars. Paint takes two or three coats with drying time between, the stencil goes on with a blotting motion rather than a stroke so nothing bleeds under the edge, and the pom poms get glued an inch at a time so the bead of glue never cools ahead of you.
Get the full tutorial at Design Improvised.
15. DIY Geometric Paper Wall Art
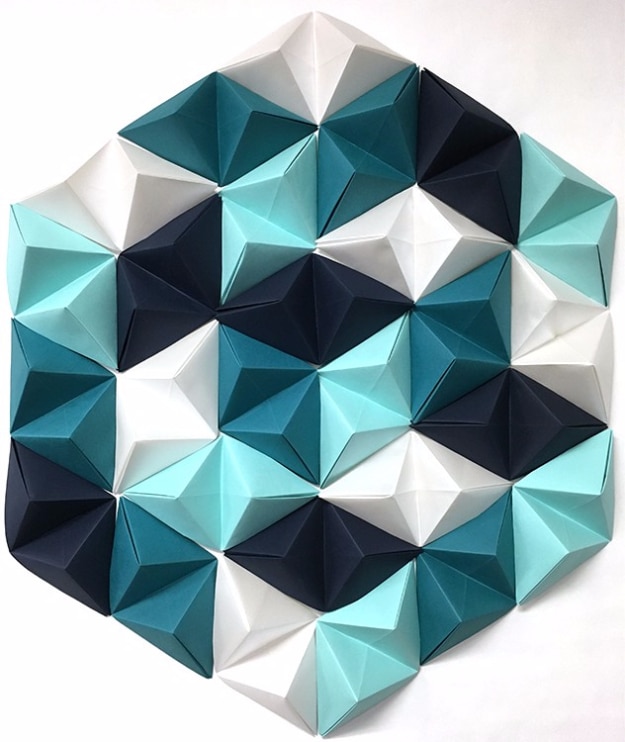
Dozens of folded paper pyramids tiled into a big hexagon in white, aqua, teal and navy, so the whole panel catches light differently along every fold. Each unit starts as a square, and the maker’s advice is to make them big enough to matter: trim a standard sheet down to eight and a half inches square rather than working small. Four colors is the sweet spot, one very pale and one very dark, because the shadows in the folds do the rest of the work for you.
Get the full tutorial at JAM Paper.
16. Grocery Bag Holder From A Tote Bag
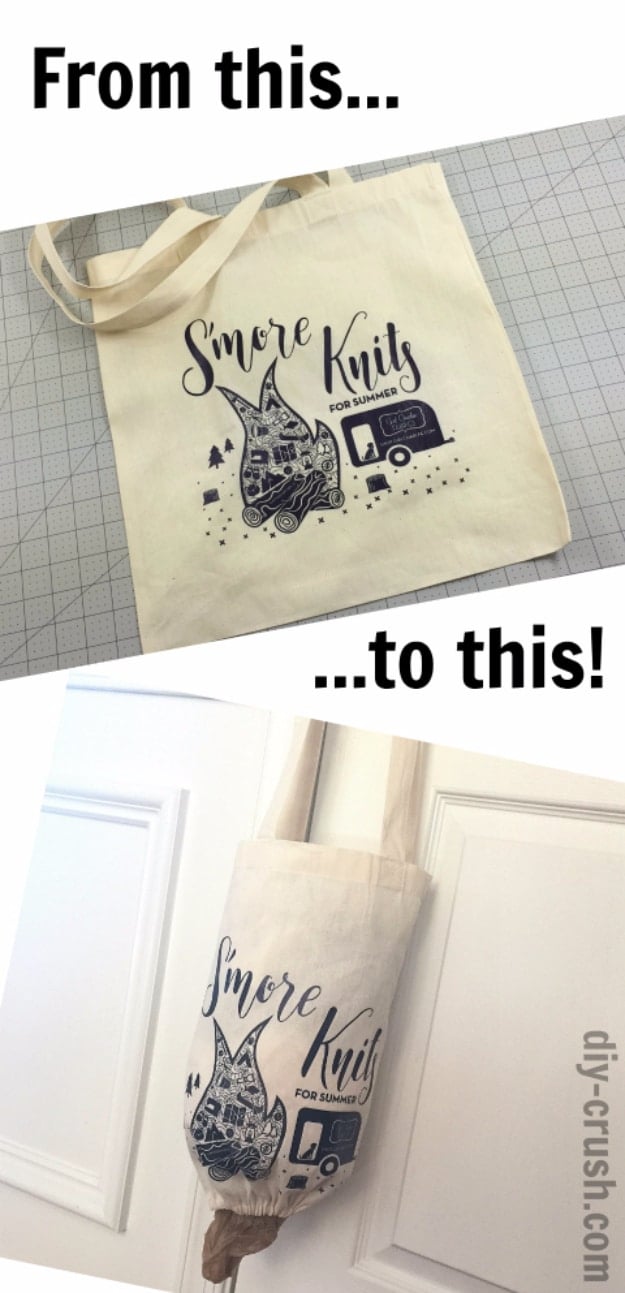
A canvas tote turned into the cinched sack that swallows all the plastic bags stuffed under your sink, hung on the inside of a cabinet door. The tote already has the side seams, the bottom and the handles, so the conversion is mostly about closing the base to a small opening and putting elastic in the top. It is the sort of upcycle that earns its keep daily. If you collect totes from shops and deliveries the way most people do, this is where the extras go.
Get the full tutorial at DIY Crush.
17. Easy Leaf Printing
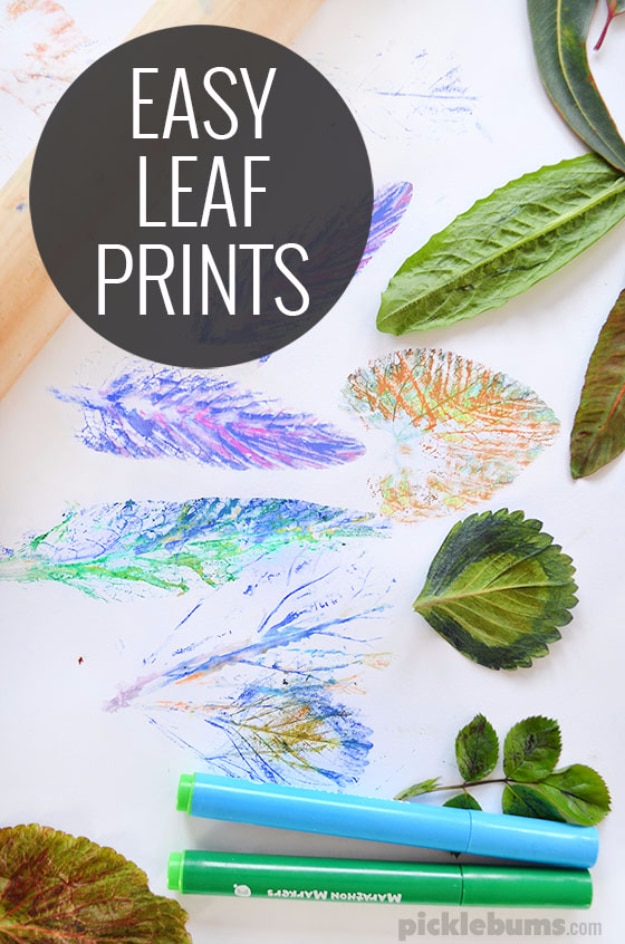
Color a leaf in with markers, press it face down on paper and roll over it once with a rolling pin, and every vein comes off as a print. Choose fresh supple leaves with strong veining on the underside, because dried autumn leaves are too brittle and snap. The maker tested her own garden and found nasturtium too soft and gum leaves too smooth, while strawberry, violet and a few weeds worked beautifully. Fat markers are gentler on the leaf than thin ones. Roll once only, then peel.
Get the full tutorial at Picklebums.
18. Easy DIY Heating Pad
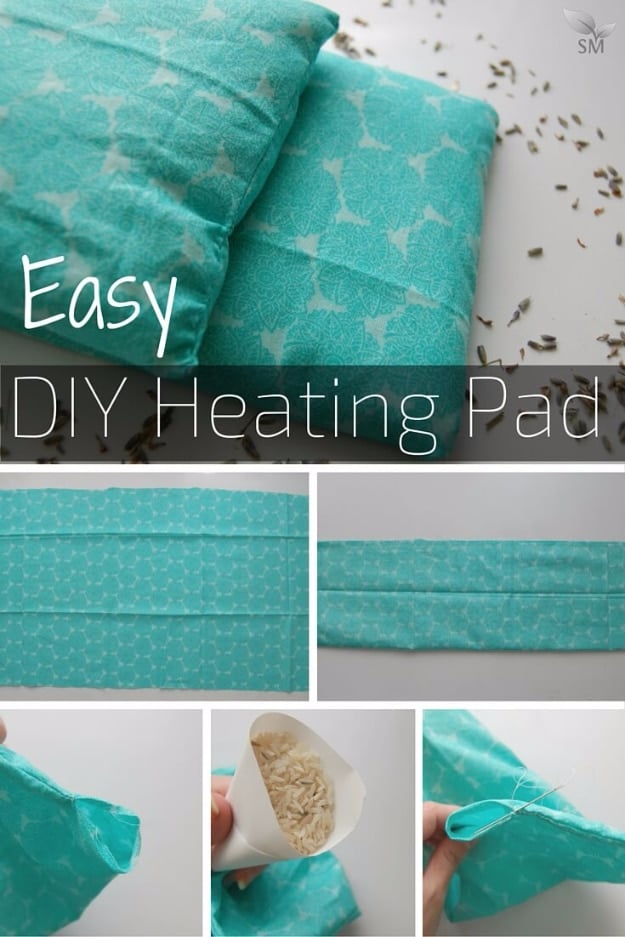
A rice bag you microwave, and the measurements are exact enough to sew from without guessing. A 12 by 20 inch piece of cotton folds right sides together into a 6 by 20 rectangle, gets sewn down three sides with a one to two inch gap left for turning and filling, then takes six cups of rice with three tablespoons of dried lavender and a few drops of lavender oil if you want it stronger. Six cups fills it about half, which is exactly what you want so it drapes over a shoulder.
Get the full tutorial at Scratch Mommy.
19. DIY Owl Button Craft
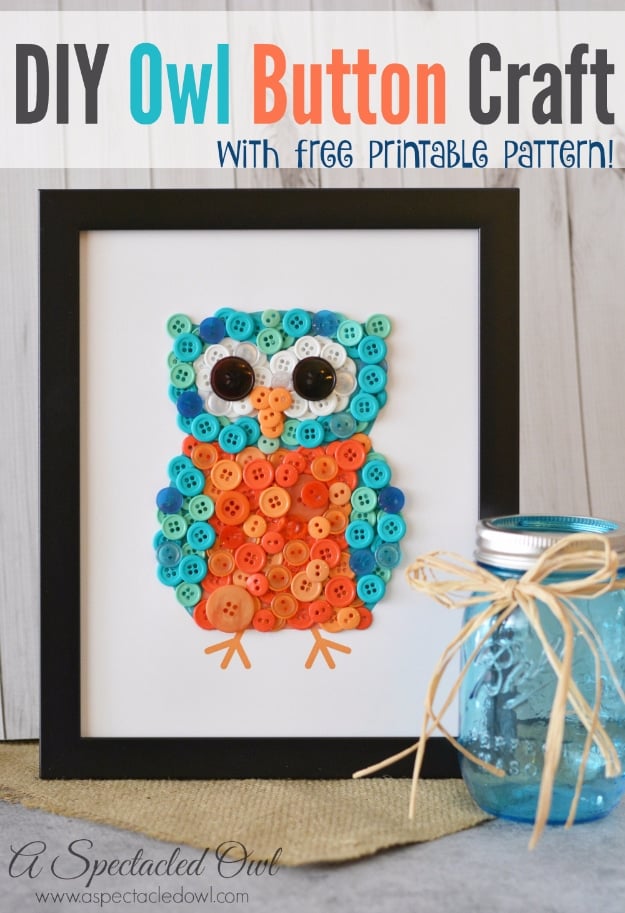
An owl built entirely from buttons inside a black frame, the body in oranges and the wings and head in blues, with a small orange triangle beak and two big white eyes. Button art like this works because the shape comes from a printed pattern underneath, so all the skill is in choosing colors and packing buttons tight enough that no background shows through the middle. Sort by size before you start gluing and save the smallest ones, which are what fill the awkward gaps around the outline.
Get the full tutorial at A Spectacled Owl.
20. DIY Stained Glass Ornaments
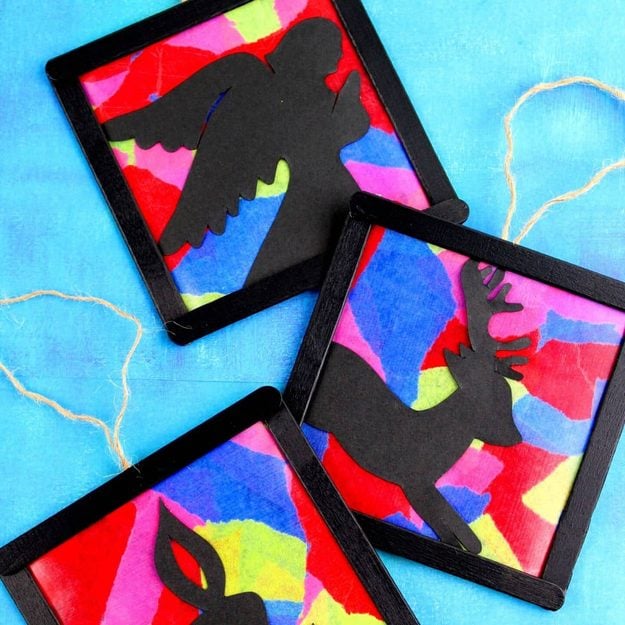
Four craft sticks painted black and glued into a square, torn tissue paper sandwiched between two pieces of contact paper, and a black cardstock silhouette glued on the front. No glass anywhere, which is exactly why children can make them. Use at least three or four tissue colors, because two reads as a pattern and four reads as stained glass. Press the bubbles out of the contact paper before you trim it. Hang them in a window as suncatchers if the tree is already full.
Get the full tutorial at Glue Sticks and Gumdrops.
21. Junk Mail Typography Collage Art
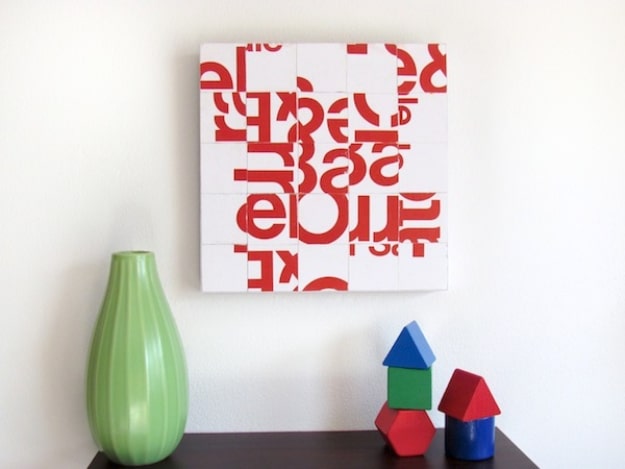
Twenty five one inch squares punched out of a red and white sale mailer, then remounted in a five by five grid so the letters land in the wrong order and the whole thing reads as pattern instead of words. The substrate is a 5 by 5 by three quarter inch piece of plywood primed and painted white. The maker’s tip is worth stealing: tape cardstock to a gridded cutting mat and use the printed lines to lay the squares out straight, rather than trying to eyeball a grid by hand.
Get the full tutorial at Mod Podge Rocks.
22. DIY Pocket Tic Tac Toe Game
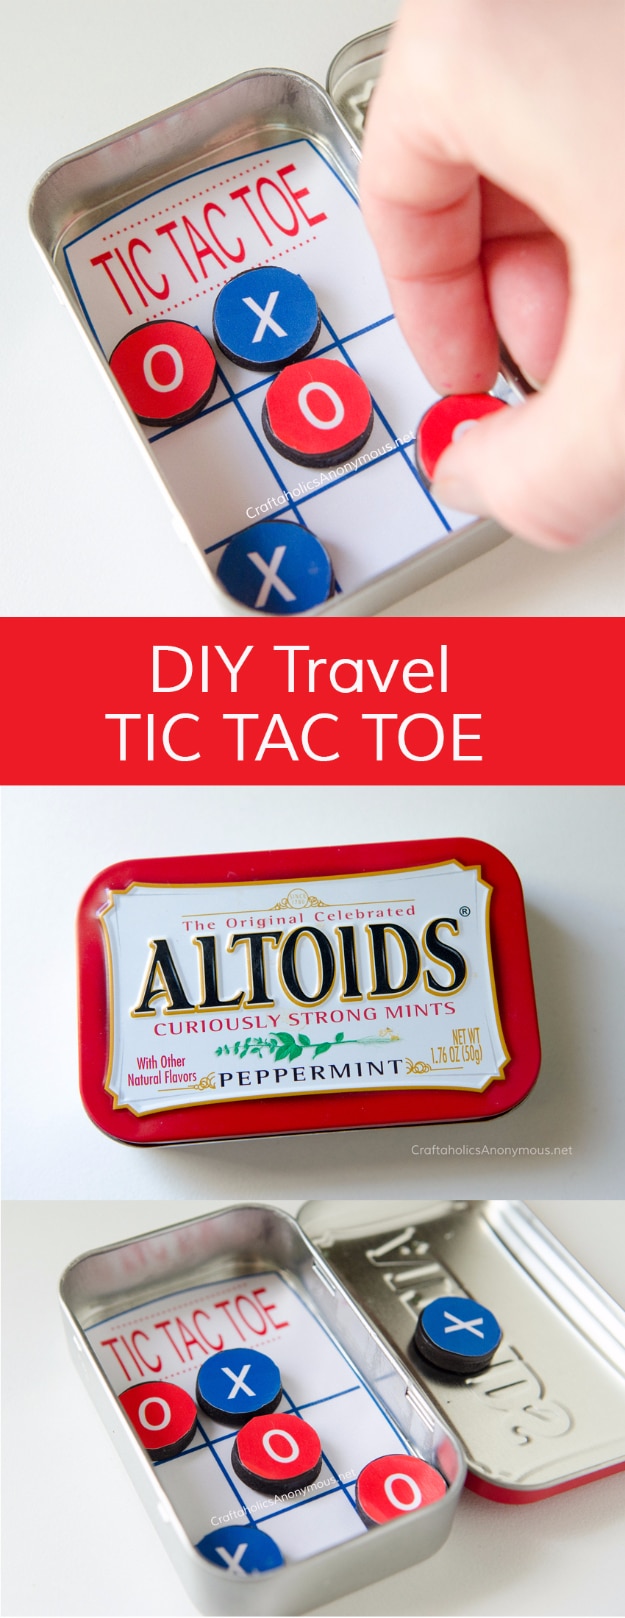
An Altoids tin with a printed board decoupaged inside the lid and ten half inch circle magnets carrying the X and O pieces, so nothing rattles loose in a bag. Print the free board, cut the pieces out, decoupage the title to the top of the tin, the board to the inside and the letters to the magnets, then let everything dry completely. The maker adds one genuinely useful warning: some decoupage brands dry tacky, so seal it with a clear coat if yours does.
Get the full tutorial at Craftaholics Anonymous.
23. Salt Water Etched Bottle
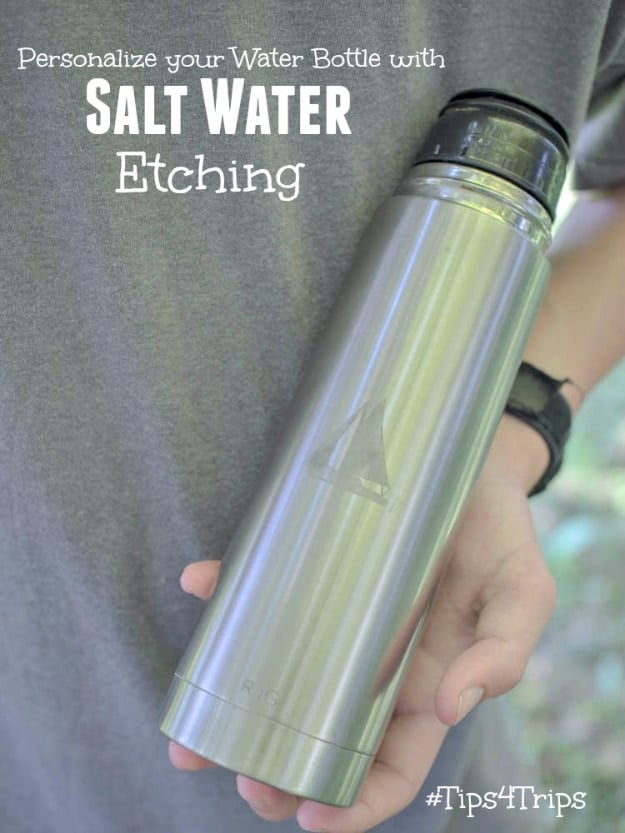
A design cut in vinyl, stuck to a steel water bottle, then etched into the metal with salt water, a battery and a pair of alligator leads. The maker teaches chemistry and explains it properly: the battery drives a redox reaction between the metal, the water and the salt, so the exposed areas corrode away and the masked areas do not. The only thing you probably do not own is the lead set. She built it because her teenage son refused point blank to take a decorated bottle to camp.
Get the full tutorial at Upstate Ramblings.
24. DIY Black And Gold Globe
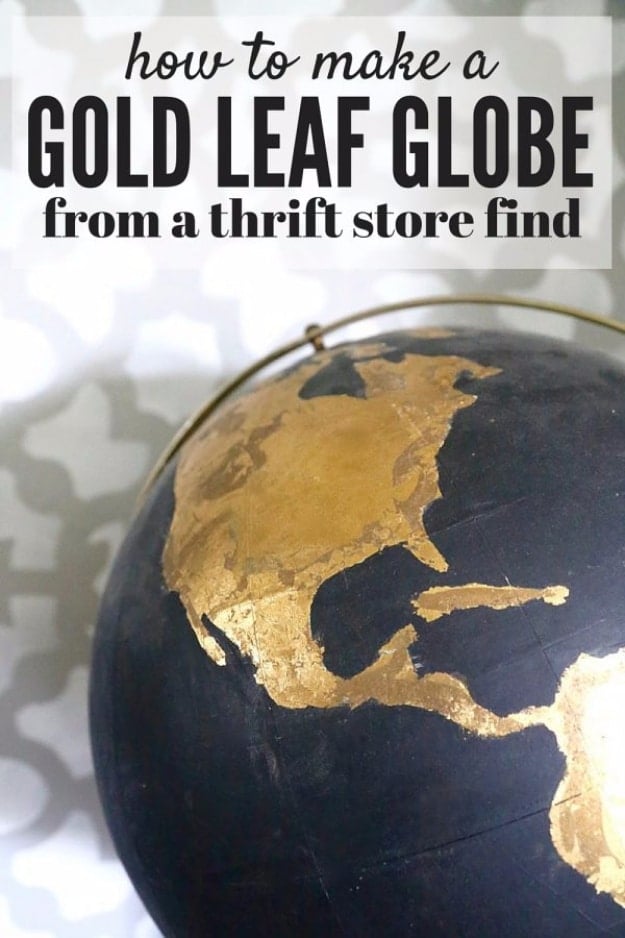
A thrifted globe with every ocean painted flat black and every landmass covered in gold leaf, so the continents float. The maker is cheerfully honest that she did not chase geographical accuracy and let a few small islands go, and that the black took two coats and about two hours. The gold leaf is the part people fear and she says it is foolproof: brush on the adhesive, wait until it goes tacky, which took five or ten minutes rather than the twenty on the packet, then lay the leaf on.
Get the full tutorial at Love and Renovations.
25. Paper Hyacinth Flowers
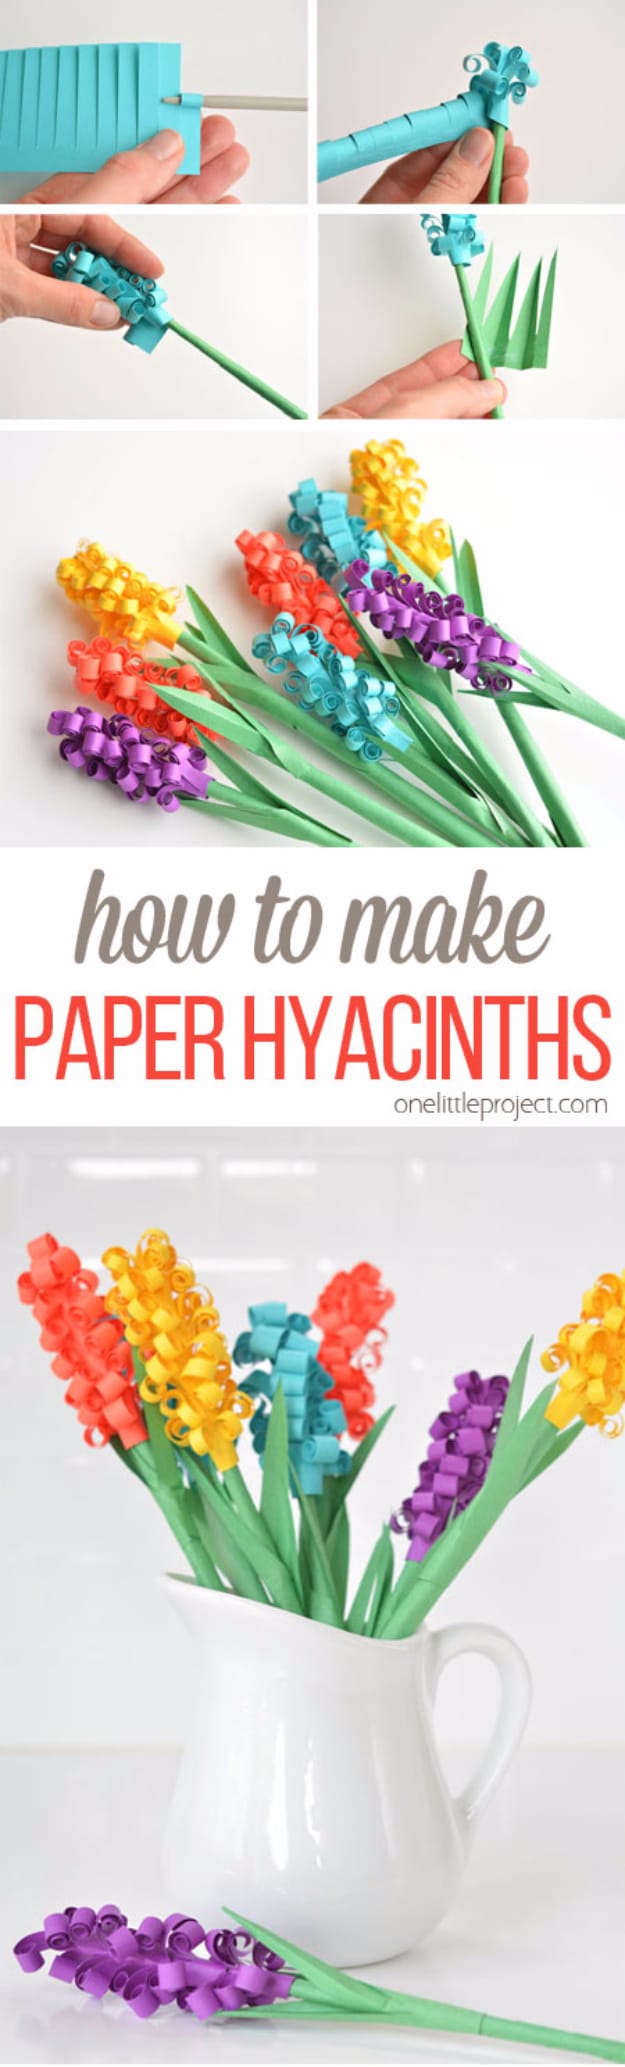
Strips of paper fringed along one edge, wrapped down a green stem so the fringe curls out into dozens of tiny blooms, in rainbow colors standing in a white pitcher. This is the paper flower that beginners actually finish, because there is no petal to cut and no shaping to get right: the entire flower is one fringed strip coiled from the top of the stem downward. Cut the fringe deep and fine, and keep the wraps tight and overlapping so no stem shows through the middle.
Get the full tutorial at One Little Project.
26. Easy Marimo Moss Ball DIY Light Bulb Aquarium
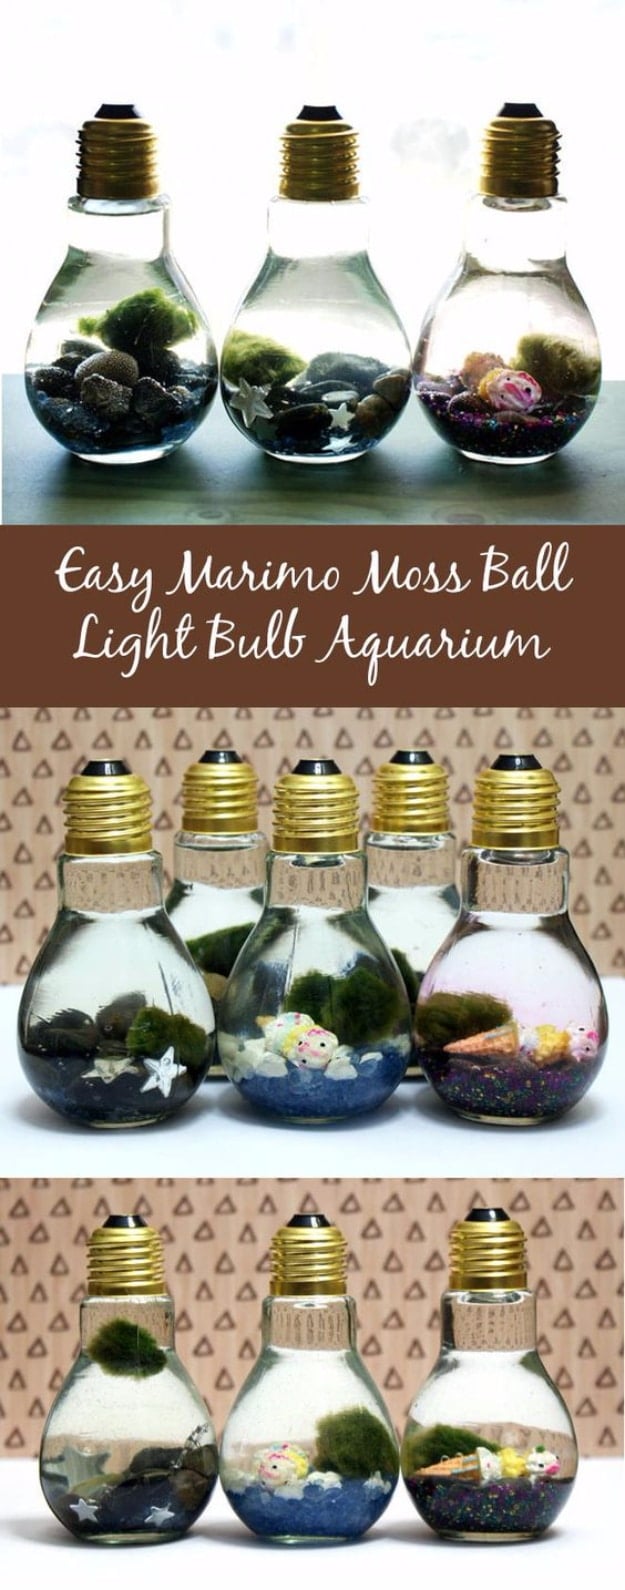
Light bulb shaped glass bottles with screw caps, filled with pebbles, tiny beads and a Japanese marimo moss ball in water. The maker found her bottles at a craft store for around a dollar and a half and says the small surface flaws vanish once the water goes in. The useful part is what she does about size: her moss balls were an inch and a quarter across and far too big for the neck, so she squeezed the water out, cut each one into quarters and rolled them back into four smaller balls.
Get the full tutorial at Soap Deli News.
27. Sharpie Dot Flower Pot Craft
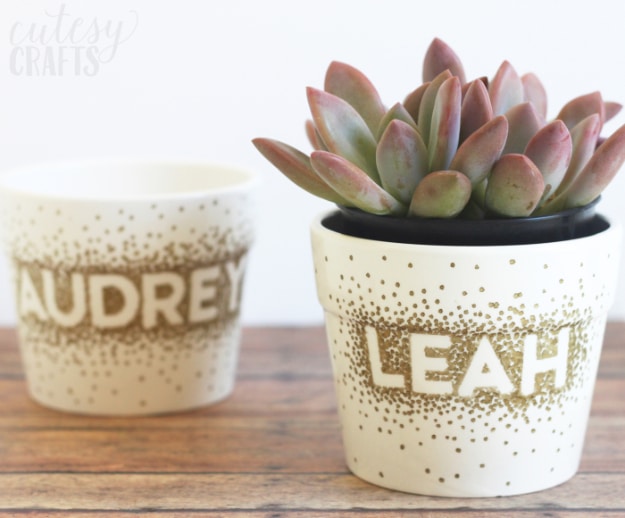
Letter stickers pressed onto a plain ceramic pot, dots drawn densely all around them with a Sharpie, then the stickers peeled off to leave the name sitting clean in the negative space. That is the whole technique and it is the sort of thing that looks far harder than it is, because you never have to write neatly, only dot around a shape. Crowd the dots tight against the sticker edges and fade them out as you move away. Three steps, no skills required, and a pot that looks personal.
Get the full tutorial at DIY Candy.
28. DIY Floral Mouse Pad
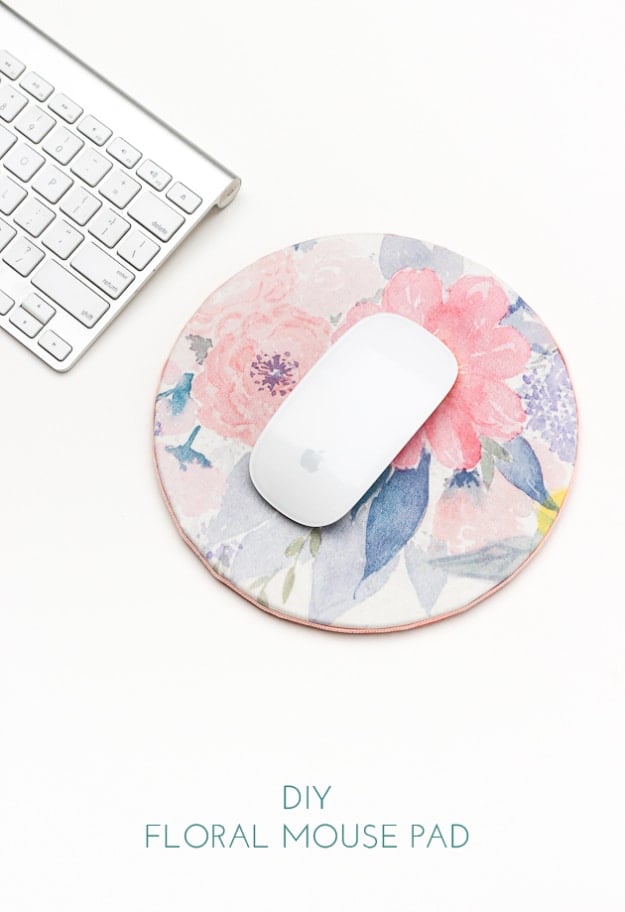
A cork round covered in a heavy floral fabric, glued with fabric Mod Podge and left overnight before anything touches it. The maker had already tried this with spray adhesive and reports that after six months it discolored the fabric, which is exactly the kind of thing you only learn by living with a project. Heavier fabric is better, because the glue bleeds through a thin one. Cut with about two inches of overhang, smooth it down and fold the excess underneath, then hide the edge with ribbon.
Get the full tutorial at The Crafted Life.
29. DIY Faux Stone Planters
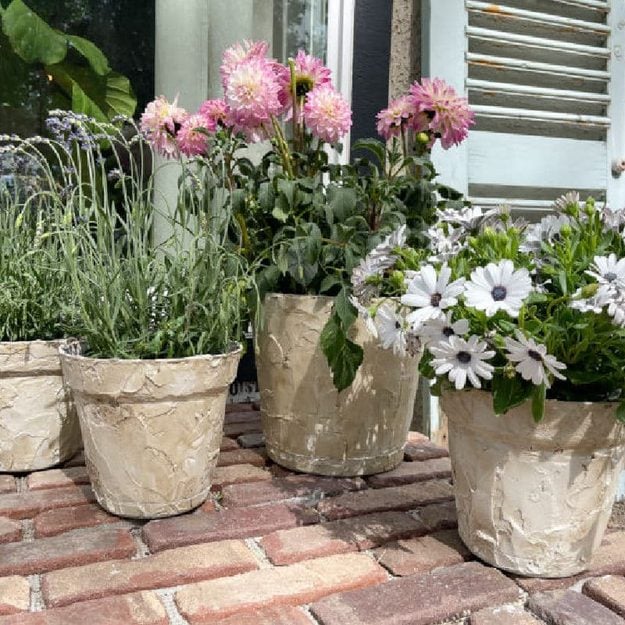
Cheap pots scraped with joint compound until the surface goes rough and chalky, then painted or stained so they pass for carved stone from three feet away and weigh nothing. The makers deliberately wrote a short version of this, because most faux stone tutorials run to ten steps and several days. There is no correct way to apply the compound: more strokes gives more texture, broader strokes give a smoother finish, and they recommend varying it pot to pot so a group does not look manufactured.
Get the full tutorial at The Design Twins.
30. DIY Soda Bottle Kitty Cat Planters
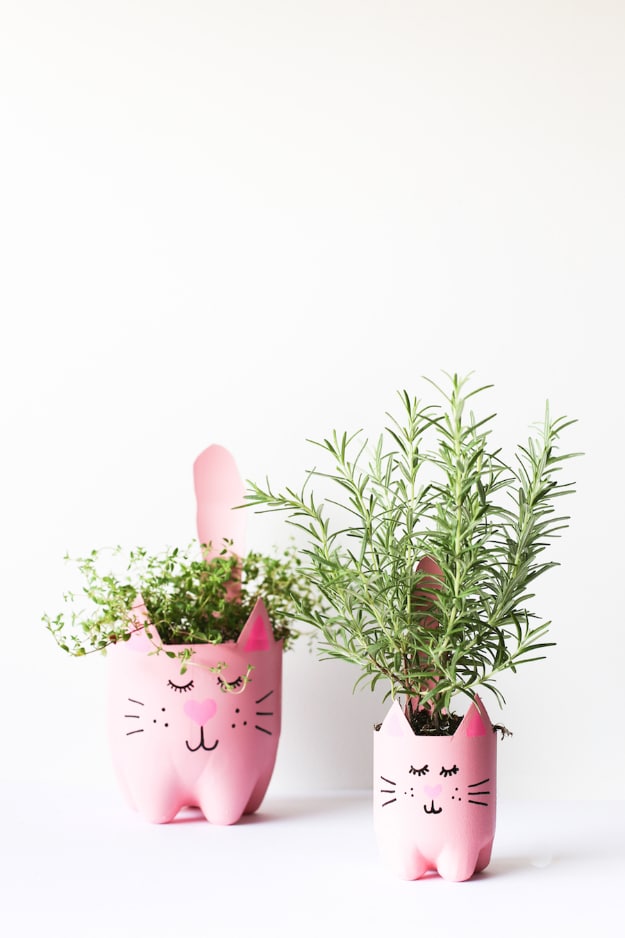
The bottom third of a soda bottle cut with two ears left standing at the front and a tail at the back, spray painted and finished with a face drawn in paint pen. Cut generously and tidy the shape afterwards, because you can always trim more off and you cannot put it back. The maker’s practical note is to draw your outline on the side that had the label, so any glue residue ends up at the back, and to paint the reverse first so nothing sticks when you roll the bottle over.
Get the full tutorial at Salty Canary.
31. DIY Sharpie Mug
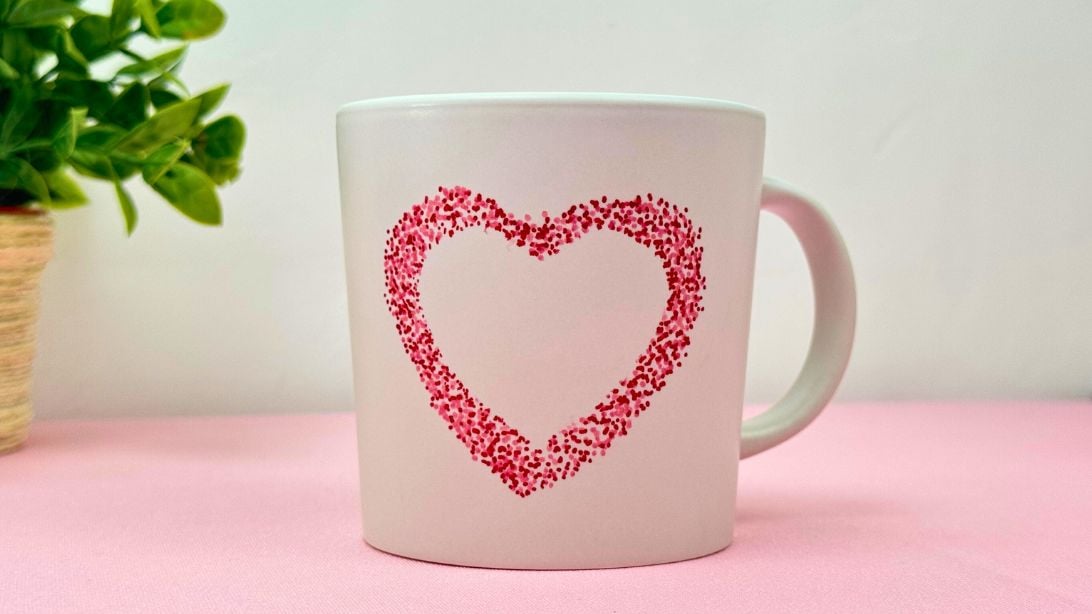
A heart drawn in dense red Sharpie dots on a plain white mug, then baked so the design stays put. Dots are the forgiving way to do a Sharpie mug, because a drawn line shows every wobble and a field of dots reads as deliberate texture however unsteady your hand is. Work the outline first and fill inward. It is the handmade gift that takes an afternoon rather than a weekend, and it suits every occasion you can think of. Ours, with the method filmed.
Get the full tutorial at DIY Joy.
32. DIY Easy Braided Bracelet
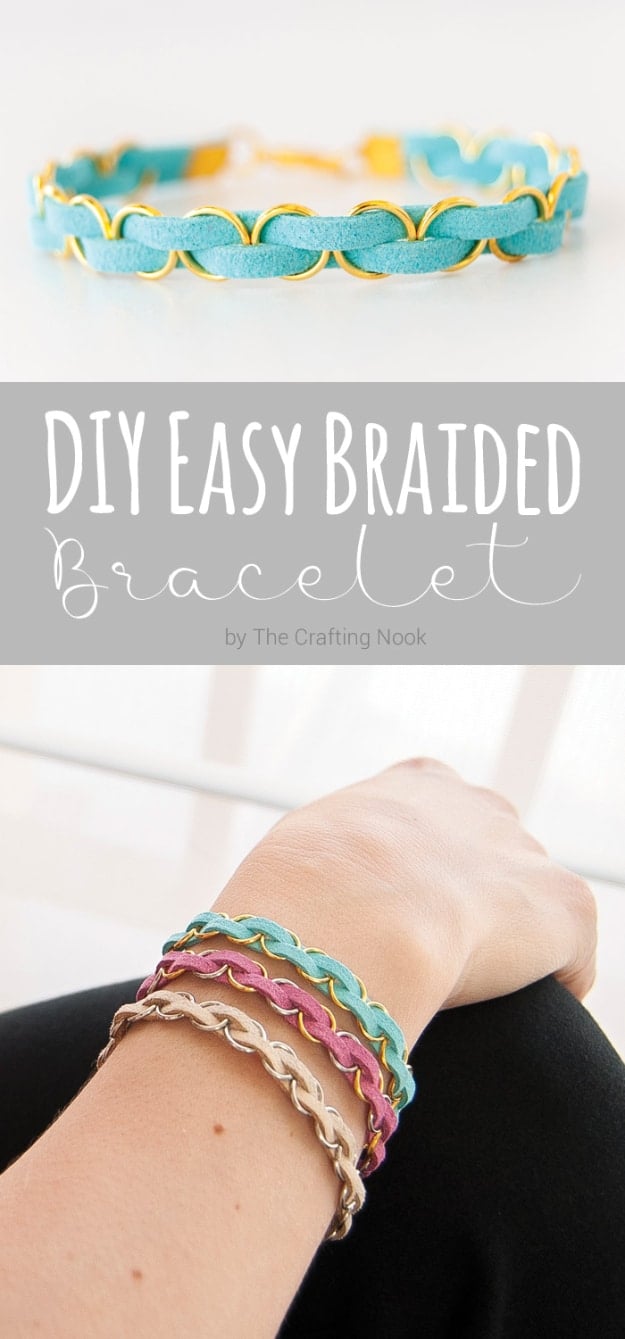
Two strands of leather cord woven through a row of jump rings so the cords cross over each other and the metal shows through like a braid. It goes faster than it looks once the pattern clicks: both cords through the first ring in opposite directions, then reverse the direction on every ring after it. The maker uses 3mm cord with 6mm rings and says to adjust one if you change the other. Two pairs of pliers makes opening the rings far easier than wrestling them with one.
Get the full tutorial at The Crafting Nook.
33. DIY Hoop Tassel Earrings
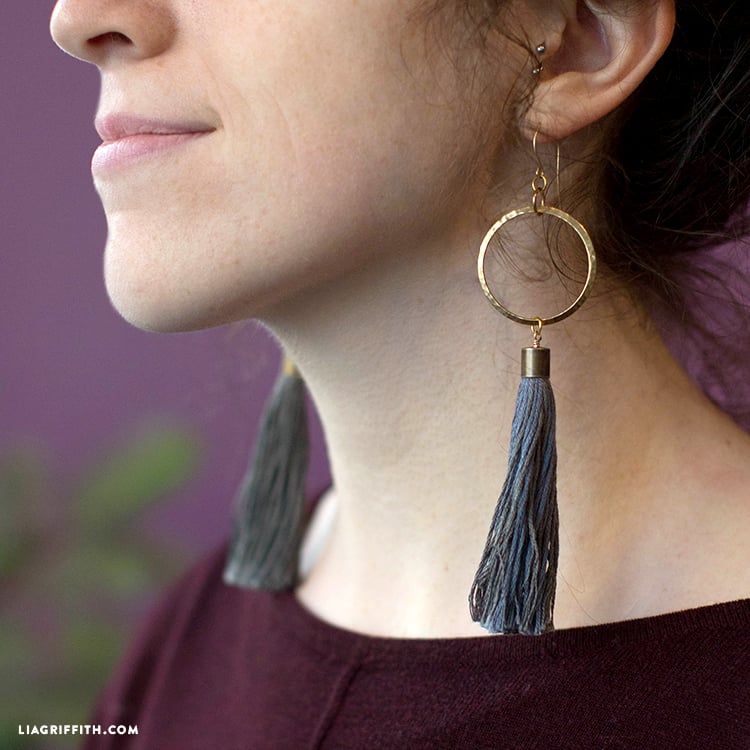
A gold hoop with a long floss tassel hanging from a small metal cap. The count is what makes them consistent: wrap embroidery floss thirty times around a piece of cardboard, tie a short length tightly around the bundle at the top, slide it off and cut the bottom loops. Then thread a head pin through a metal cap, make a wire wrapped loop, glue the tied end of the floss into the cap with E6000 and trim the bottom straight. Hang the hoop through the loop and they are done.
Get the full tutorial at Lia Griffith.
34. Yarn Pumpkins Made From Toilet Paper Rolls

Toilet paper rolls wrapped in chunky yarn until no cardboard shows, and suddenly the box of saved rolls in the craft cupboard has a reason to exist. Go as thick as the yarn aisle allows, because fine yarn takes forever and still lets the cardboard peek through between wraps. Arrange them with pine cones and silk leaves around a few candles and the whole mantel is done. Ours, and there is a full video of it, which helps with the part where you tuck the ends in.
Get the full tutorial at DIY Joy.
35. How To Make A Spider Web Using Hot Glue
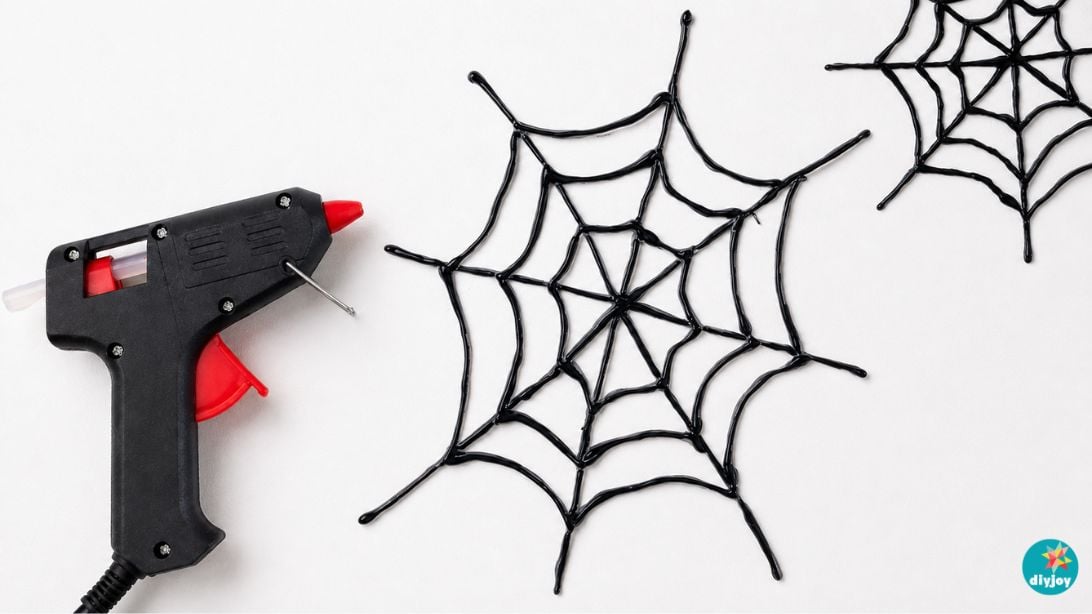
Draw a web on parchment paper, trace it in hot glue, let it set and peel the whole thing off as one flexible sheet. That is the entire method, and it costs about as much as the glue sticks. Make them in a range of sizes rather than all the same, hang them with clear nylon string, and add paper bats or small spiders once they are up. Acrylic markers color them if you want something other than clear. Ours, and it is the cheapest Halloween decoration on the site.
Get the full tutorial at DIY Joy.
36. 5-Minute Mini Notebook DIY
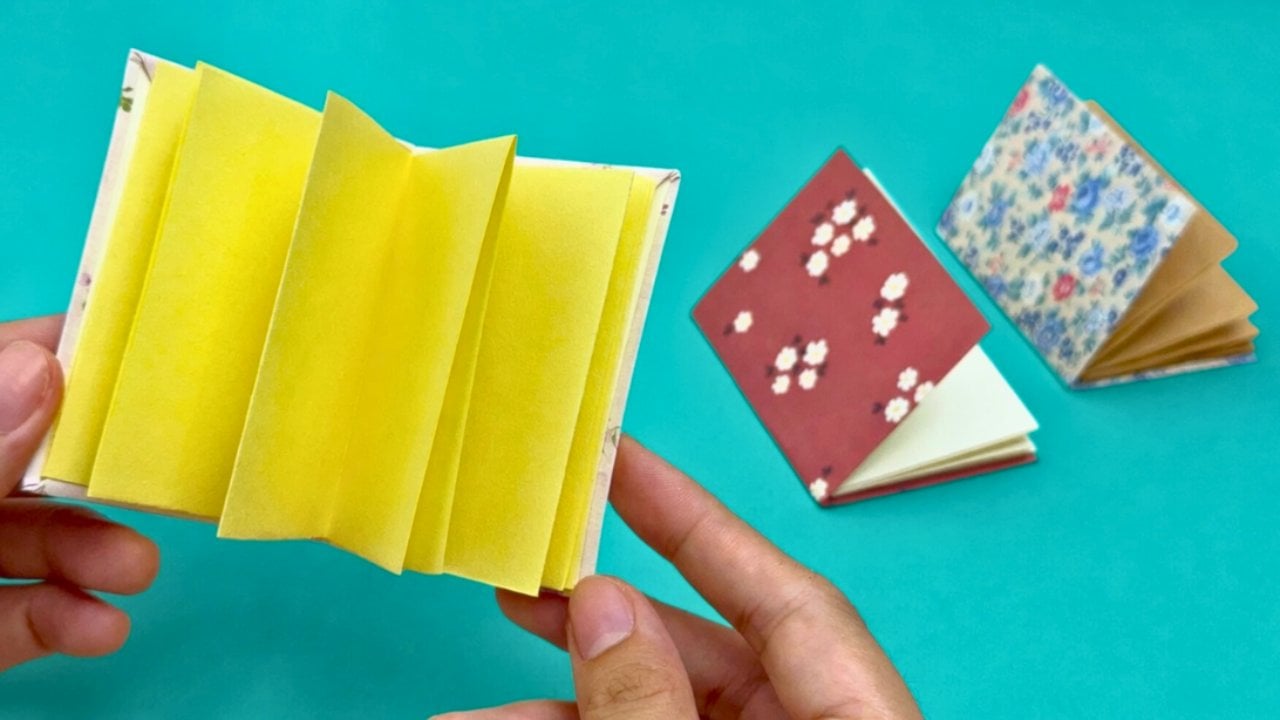
A pocket sized notebook folded out of leftover scrapbook paper, small enough to live in a bag and quick enough that you will make six. Every crafter has the same drawer of offcuts too pretty to throw away, and this is the project that finally spends them. Use a patterned sheet for the cover and plain for the pages so the inside is actually writable. Ours, filmed start to finish, and the whole thing genuinely takes about five minutes once you have folded one.
Get the full tutorial at DIY Joy.
37. DIY Hot Glue Keychain
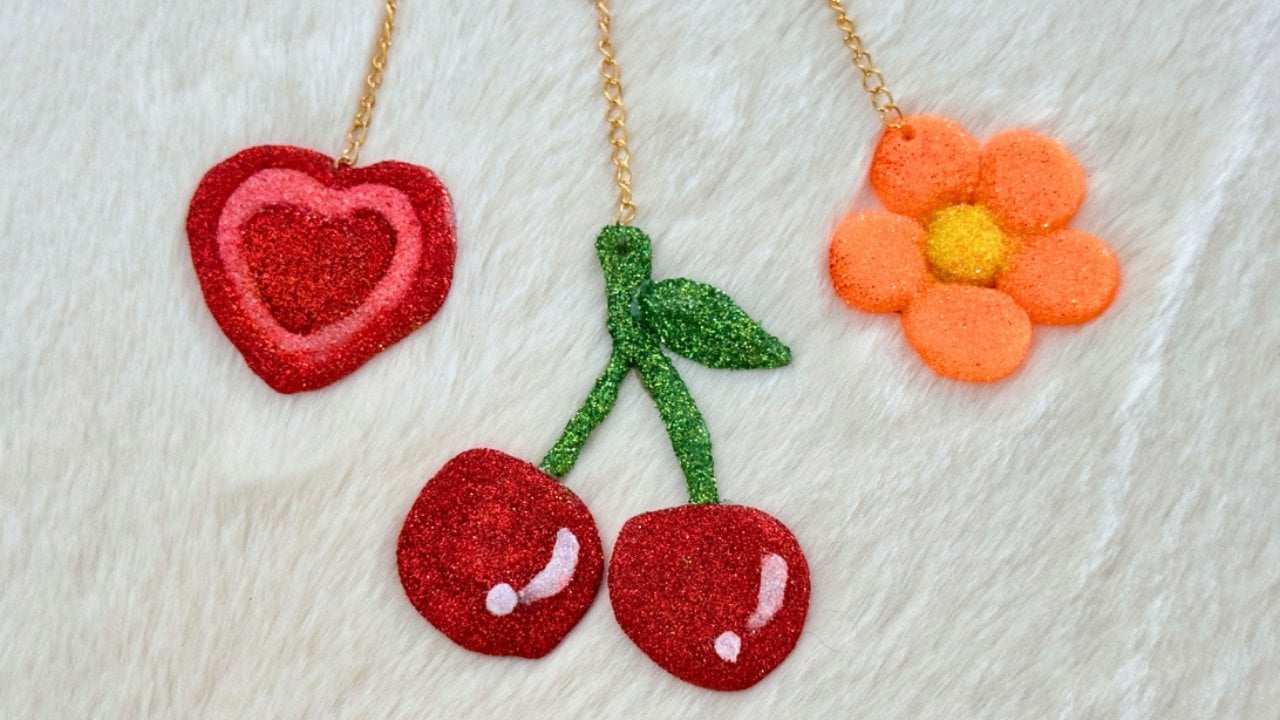
Hot glue and glitter poured into a shape, left to set, then peeled off and hung on a chain. It came out of exactly the situation every crafter recognises: a pile of leftover glue sticks from other projects and a glitter collection that needed using. Cherries, hearts and flowers all work because they are simple outlines with no thin necks to snap. Let each piece cool completely before you lift it. Ours, with a full video.
Get the full tutorial at DIY Joy.
38. Upcycled DIY Light Bulb Mini Planter
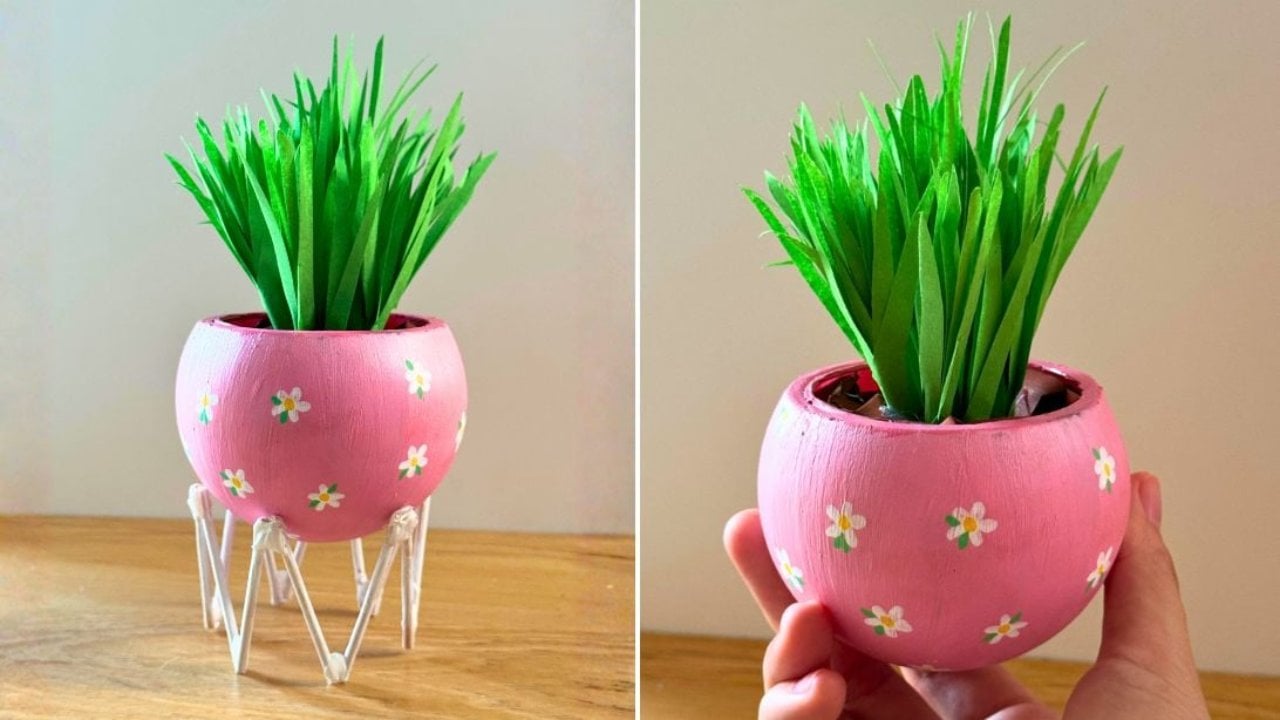
A dead light bulb becomes a tiny planter by using the round glass body as the pot, which is the kind of upcycle that stops you throwing anything away ever again. It needs almost nothing in the way of materials, which is why it suits an absolute beginner. Real succulents work in it and so do paper or artificial plants if you would rather not deal with watering something that has no drainage. Ours, with the whole process filmed.
Get the full tutorial at DIY Joy.
39. DIY Air-Dry Clay Jewelry Organizer Using Pebbles
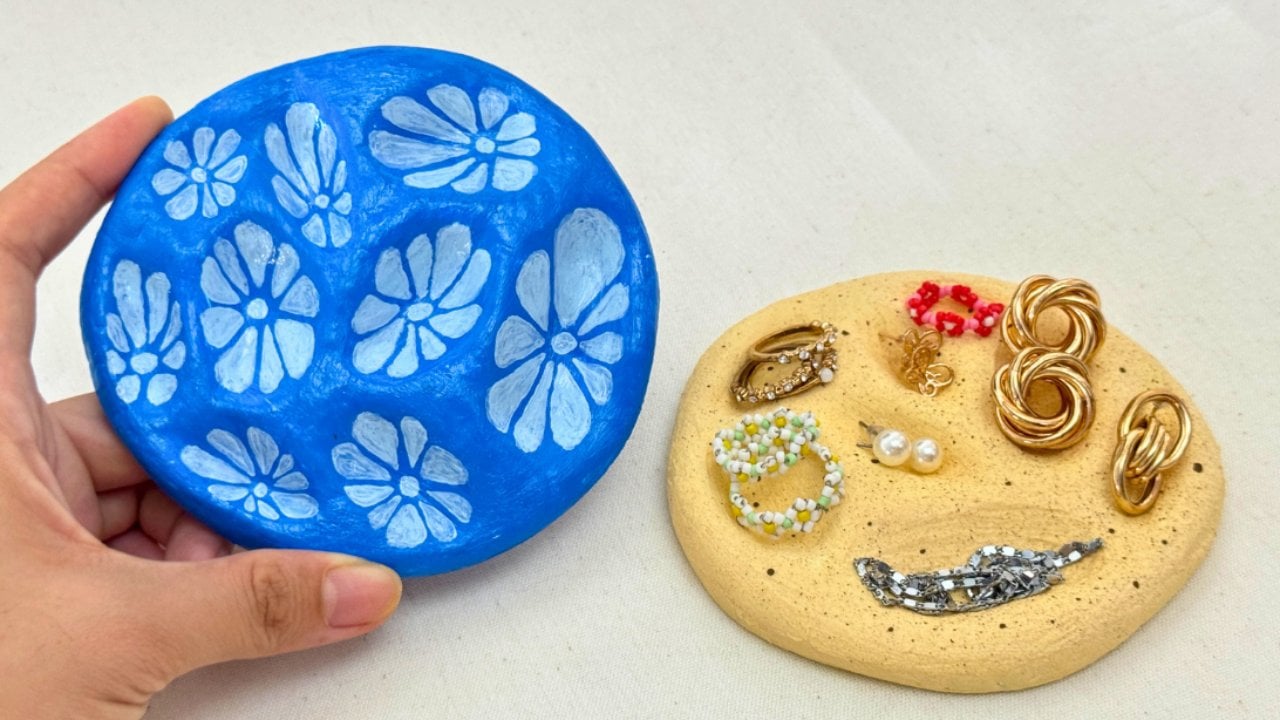
A clay dish with a pattern pressed into it by pebbles rather than smoothed flat, which is what lifts it above every other air dry clay trinket dish on the internet. Rings, earrings and small keepsakes stop migrating around the bedroom and live in one place that is nice enough to leave out. Pressing texture in is also the most forgiving finish available, because an uneven surface is the point. Ours, and the full method is on video.
Get the full tutorial at DIY Joy.
40. DIY Paper Candy Package
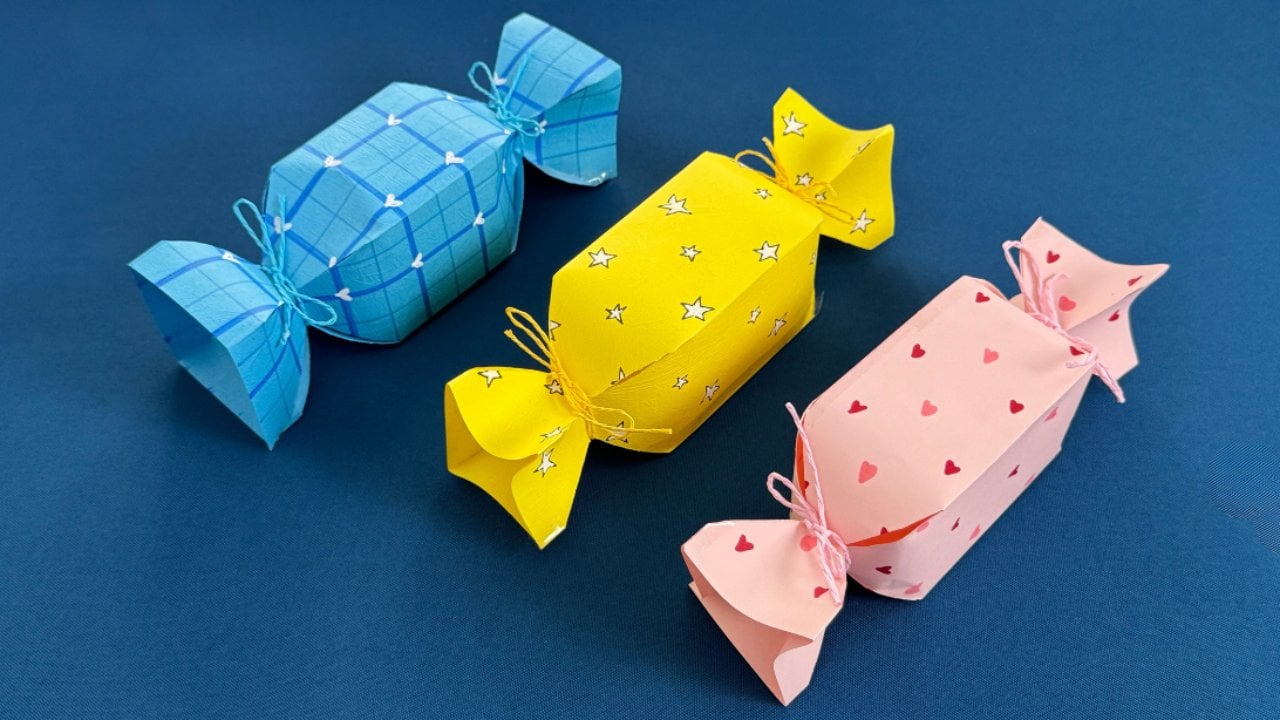
A gift wrap shaped like a wrapped sweet, twisted and tied at both ends, for the small presents that never fit a box. Jewelry, party favors, gift cards, a handful of actual sweets. It takes almost any paper you have, scrapbook, patterned, construction, wrapping paper or plain, which means the wrapping costs nothing on a night when the shops are shut. Ours, with the full fold on video.
Get the full tutorial at DIY Joy.
41. DIY Denim Jean Organizer
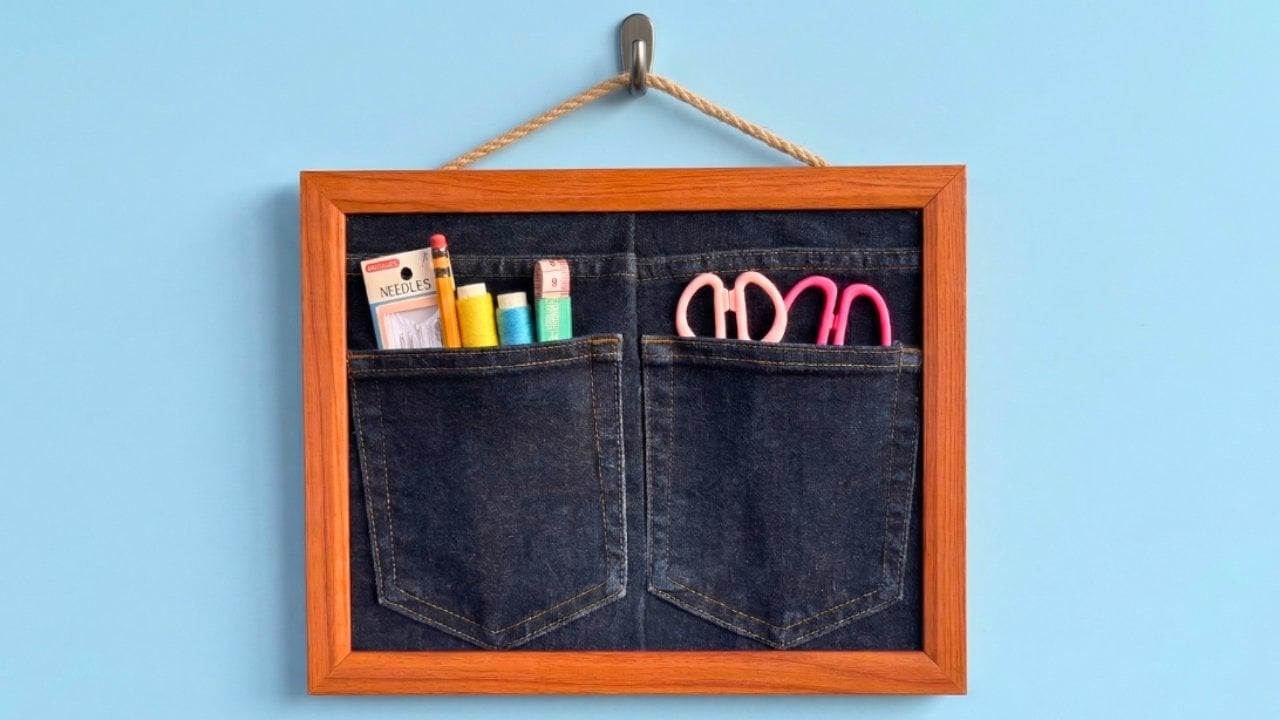
The back pockets cut off an old pair of jeans, mounted on a denim panel inside a wooden frame and hung on the wall to hold scissors, needles, tape and the small tools that go missing constantly. Pockets are the part of a pair of jeans that is already finished work, so you are recycling a completed piece of construction rather than sewing one. Perfect over a craft table or a sewing corner where wall space is free and drawer space is not. Ours, with a full video.
Get the full tutorial at DIY Joy.